Restoration

Kitchen Restoration in Hampton

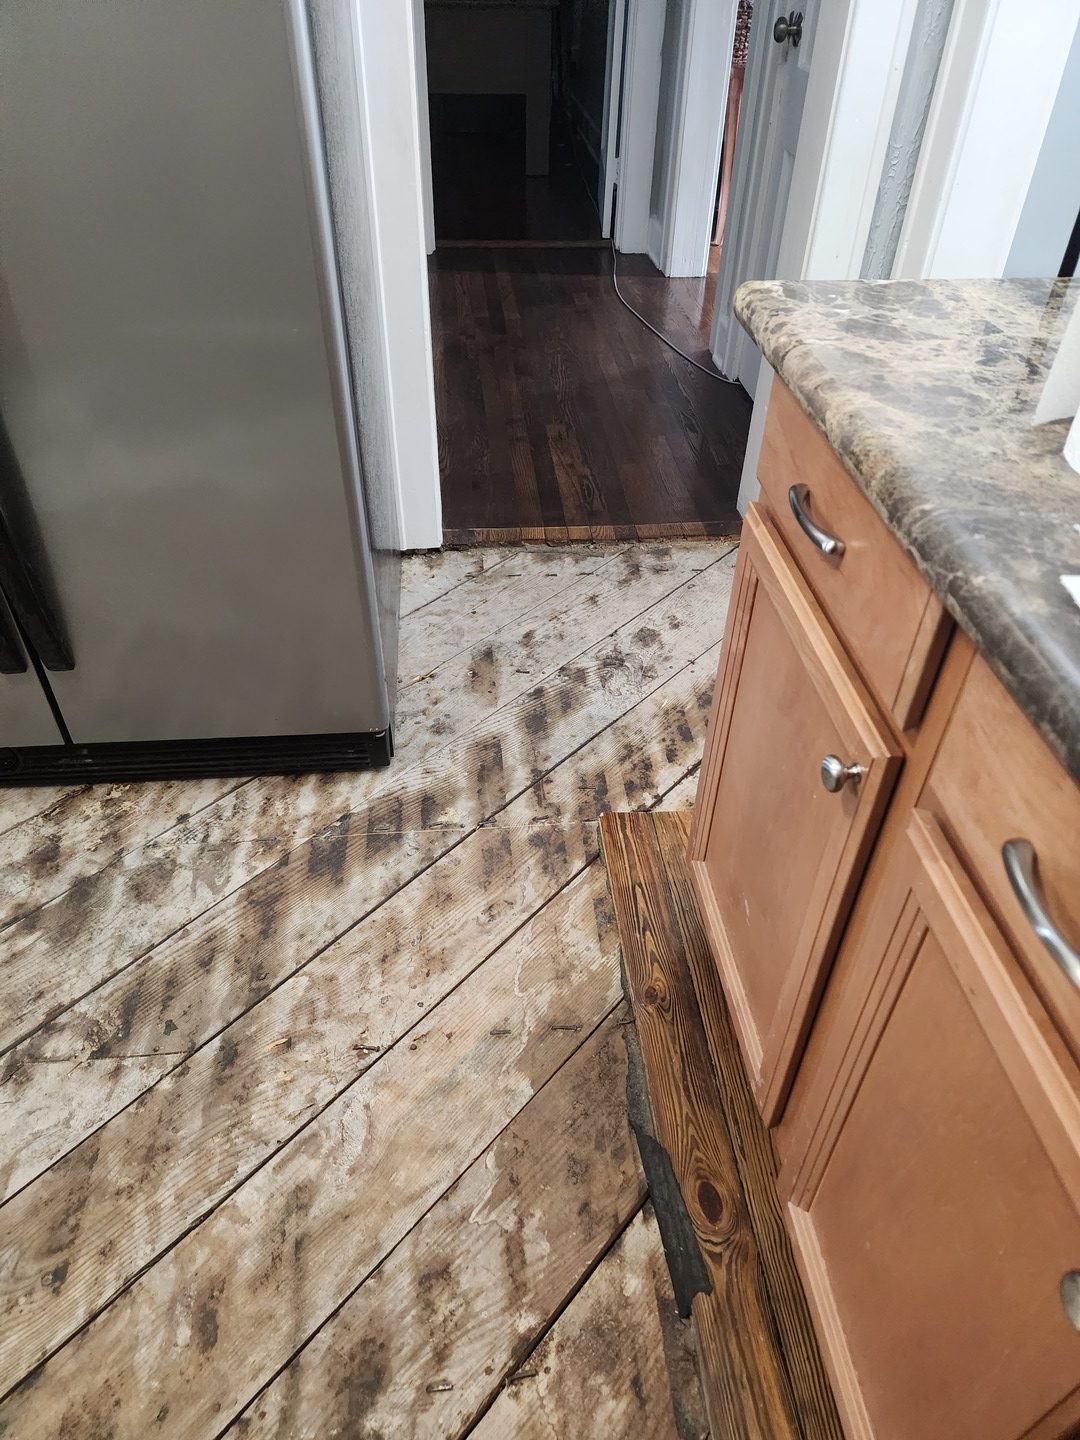
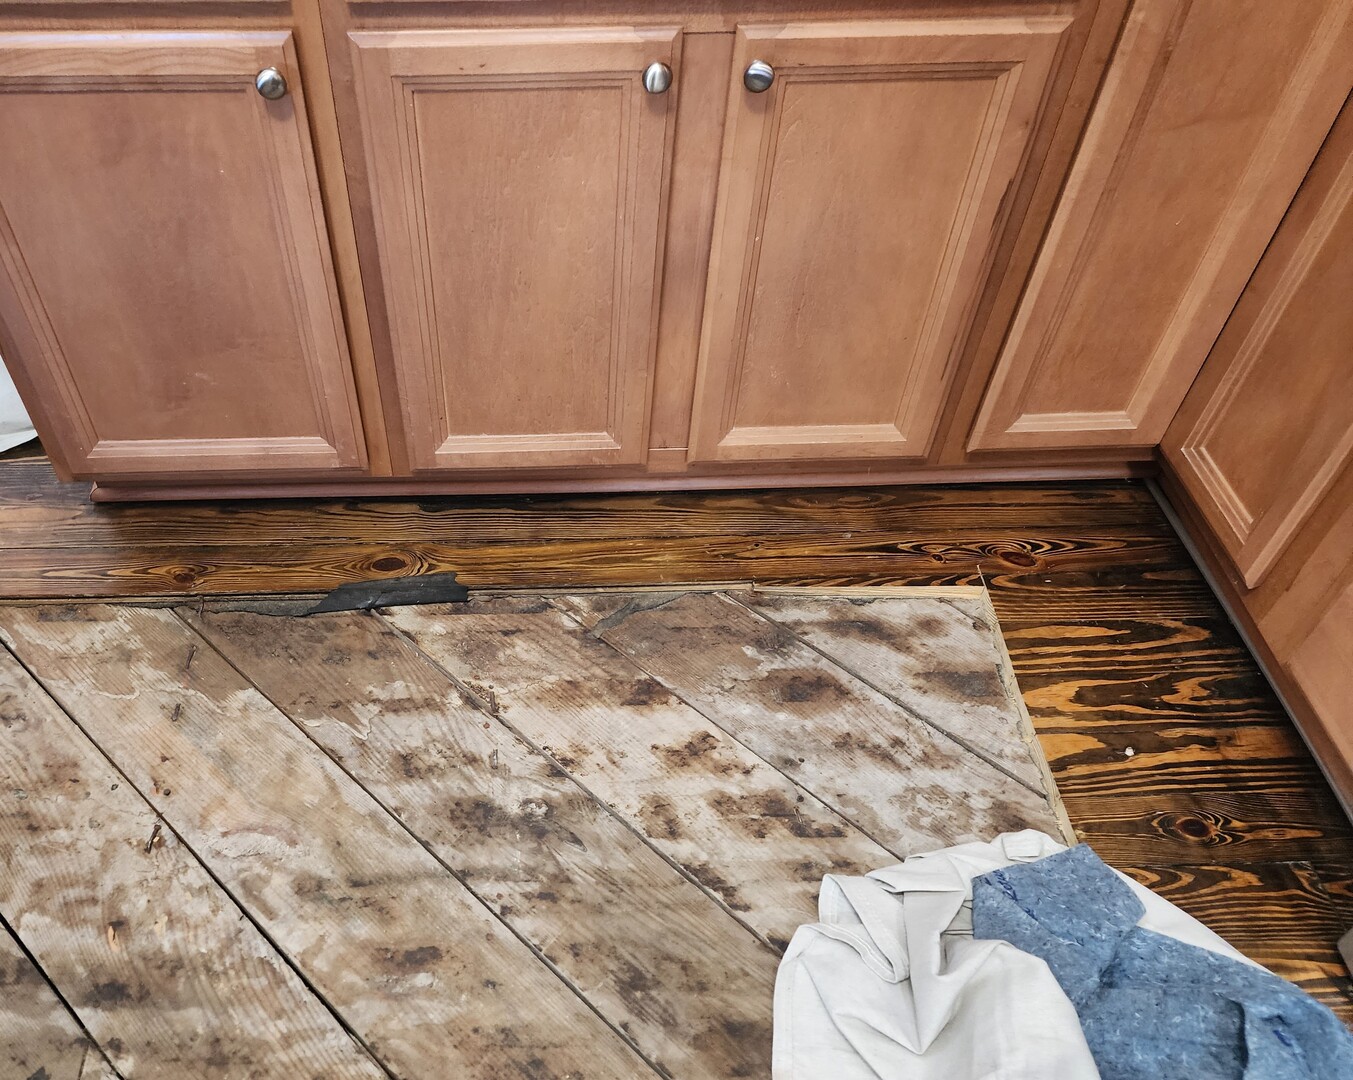
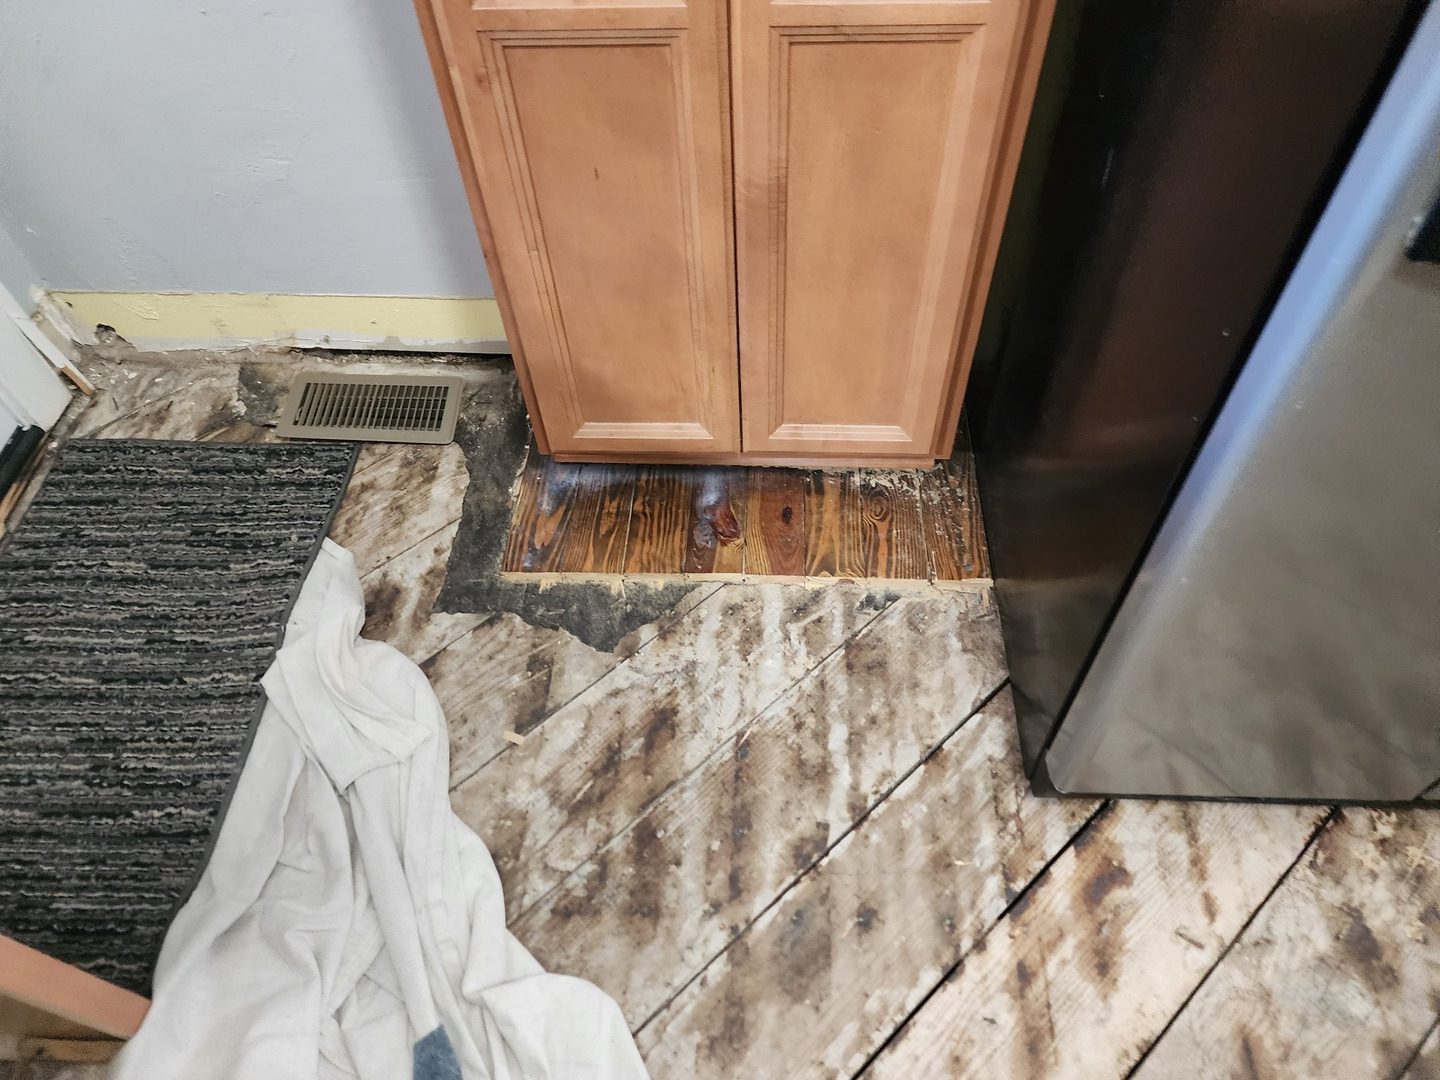
After a faulty dishwasher flooded his kitchen, Mr. Amadi was referred to us by a mutual friend. When we first met with him in November, the damaged floor coverings and baseboards had been removed, and the adjuster had provided his estimate for the cost of repairs. One big industry secret with insurance loss claims is that the first estimate a homeowner receives from an insurance adjuster is oftentimes much lower than the actual cost to repair. While the adjuster is trying to get the homeowner some financial help as quickly as possible, he usually understands that the actual cost of repairs will likely be higher than his first estimate.

In Mr. Amadi’s case, his adjuster was only allowing for the replacement of the damaged base cabinets. However, because we were unable to find replacement base cabinets that would match the upper cabinets that were expected to remain in place, we spoke with Mr. Amadi’s adjuster on his behalf, and requested full replacement of all the cabinets. After all, our client had a matching kitchen before the water damage, so shouldn’t he be entitled to a matching kitchen when the repairs have been completed?

After our team spent weeks in discussion with the adjuster and his supervisors, Mr. Amadi invoked his right to Appraisal. In this process, an independent adjuster is named for each side. They each create their own estimate for the cost of repairs, and then work to resolve the claim so the homeowner is fully indemnified for their loss, within the limits of the policy.

Because Jim Hicks Home Improvement is an expert in dealing with these types of insurance claims, we were able to get Mr. Amadi additional coverage for the kitchen repairs – including replacement of the upper cabinets. This allowed us to move forward with the kitchen remodeling project he wanted.

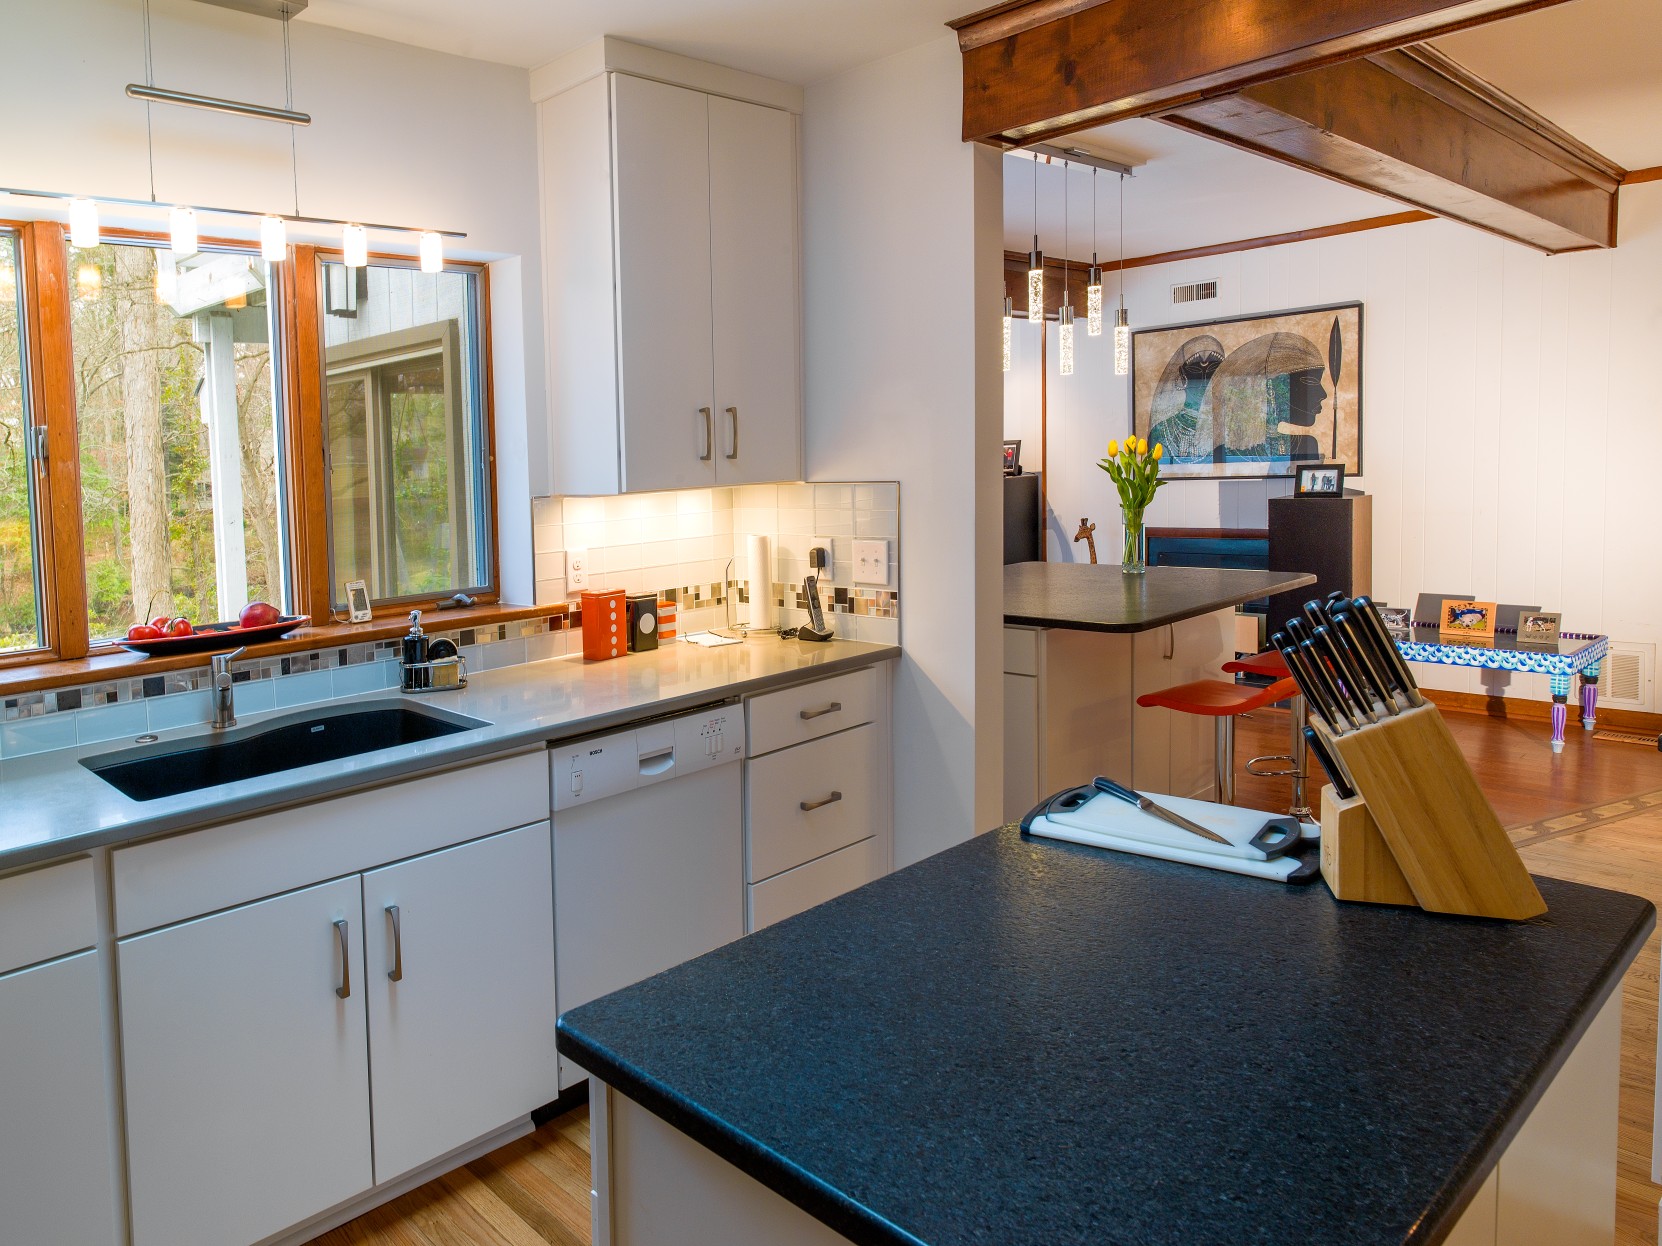
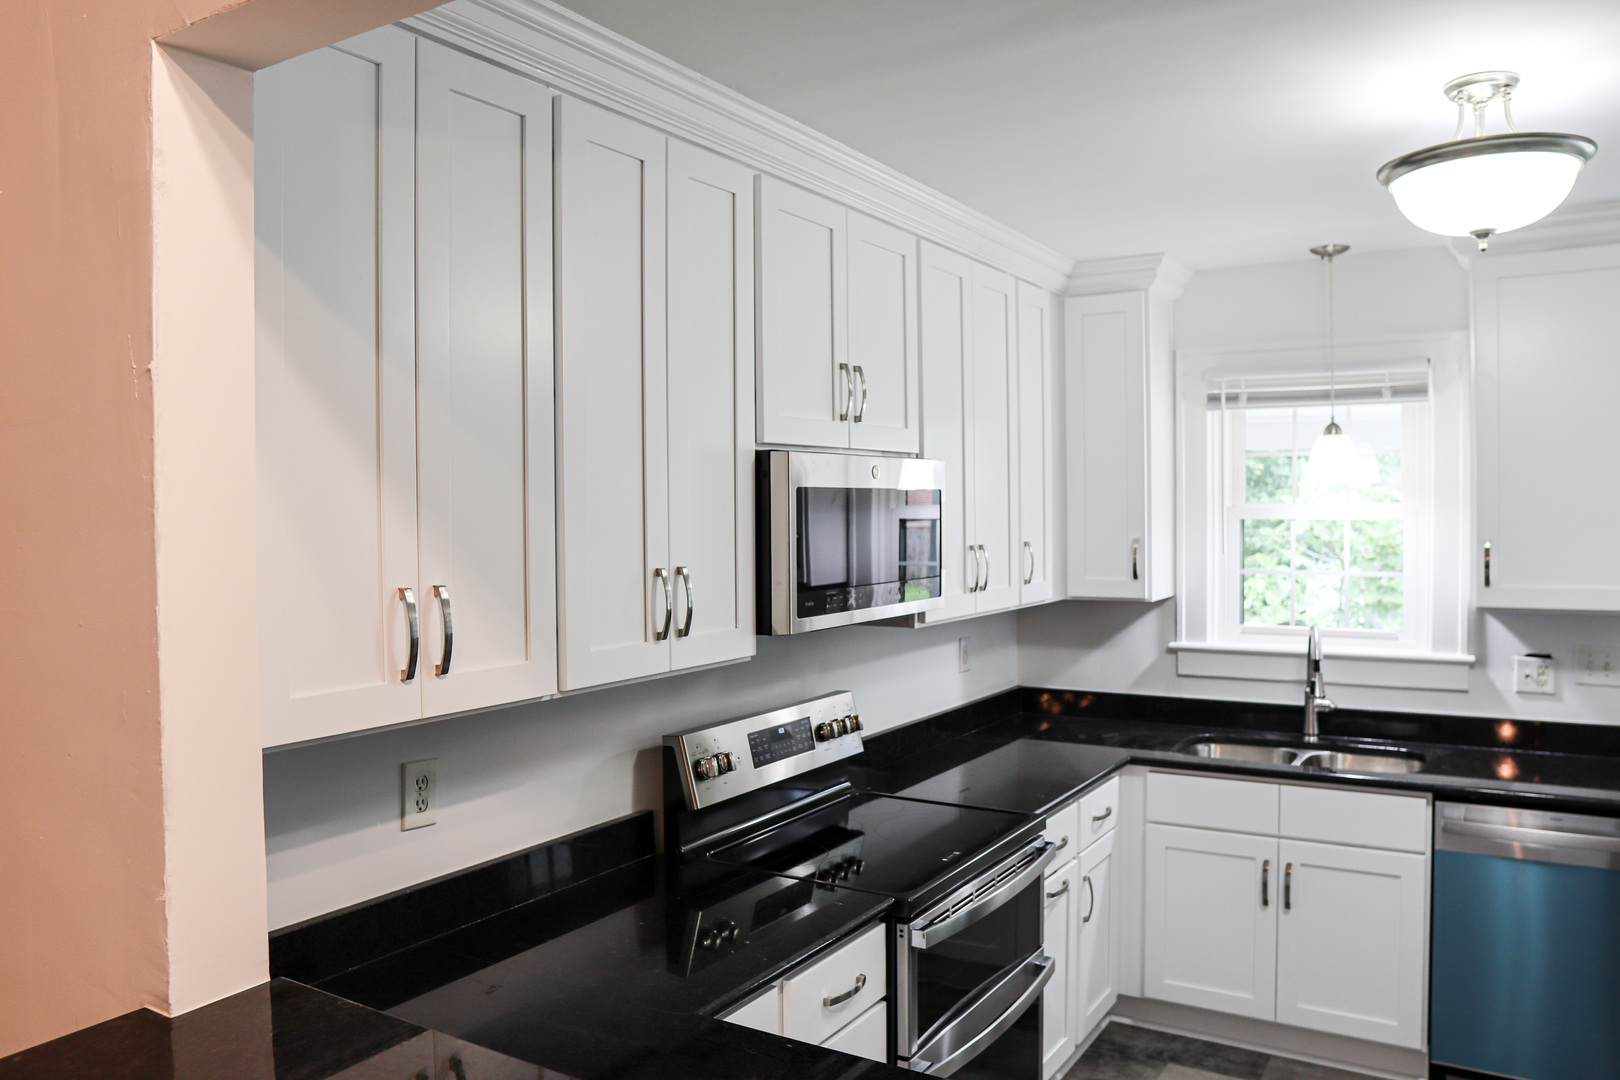
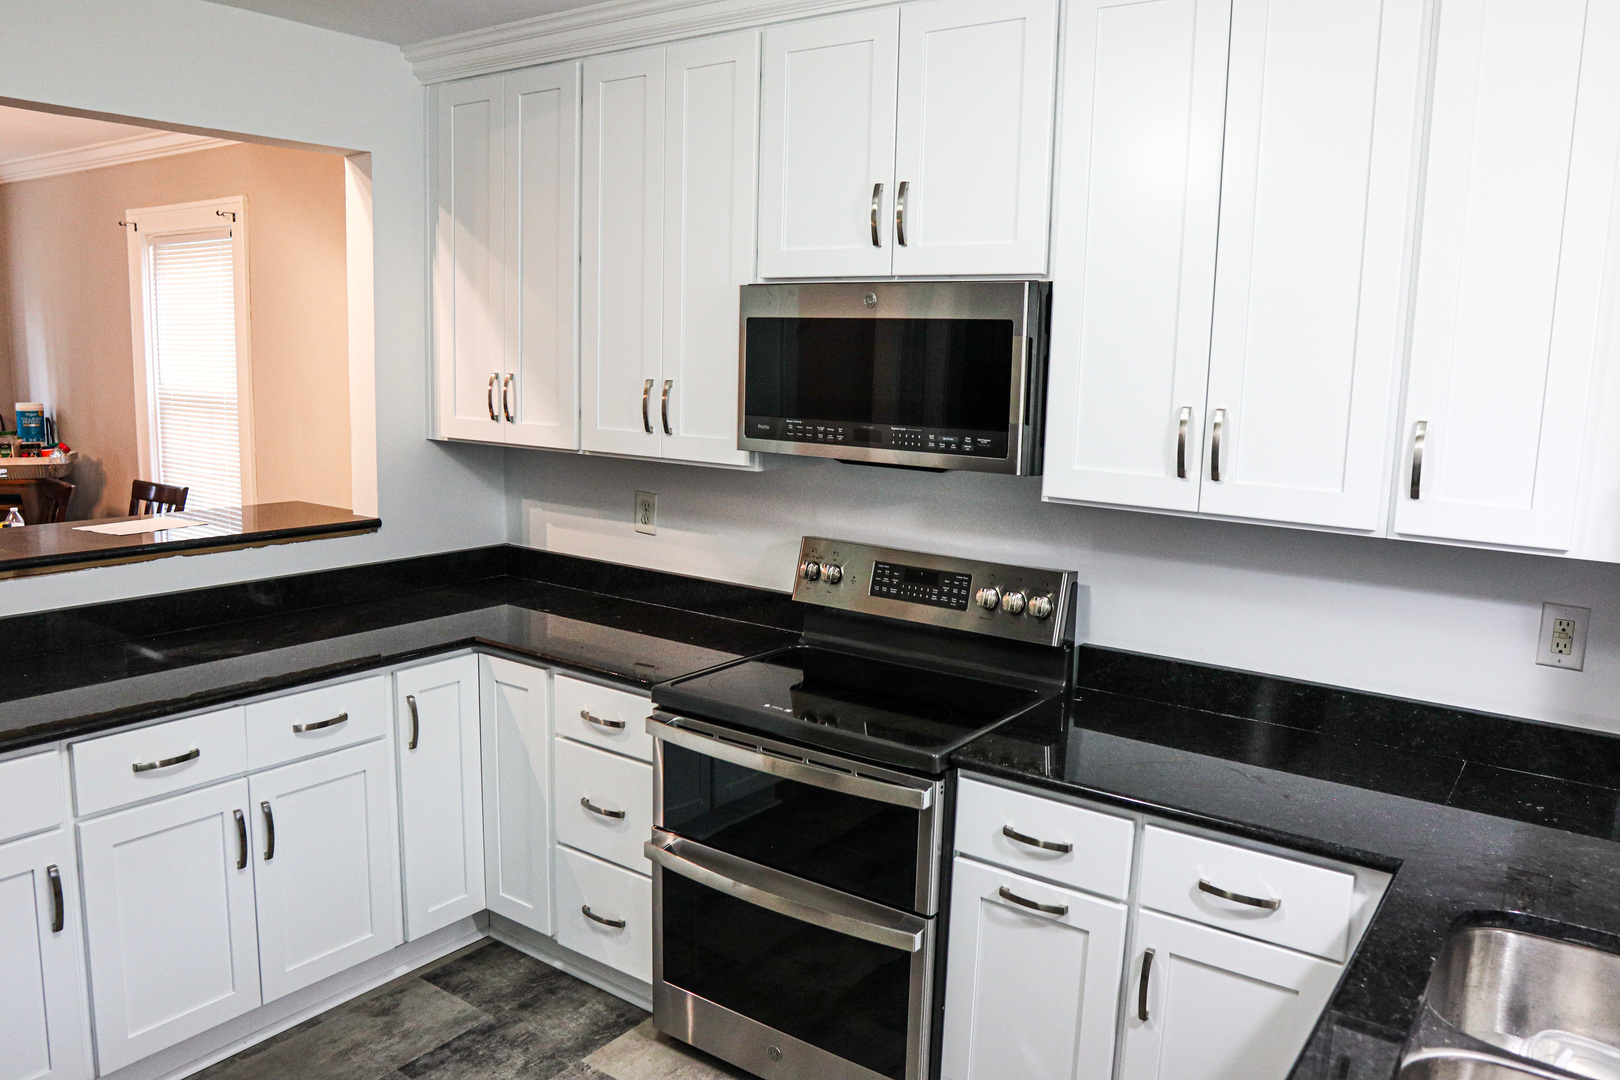
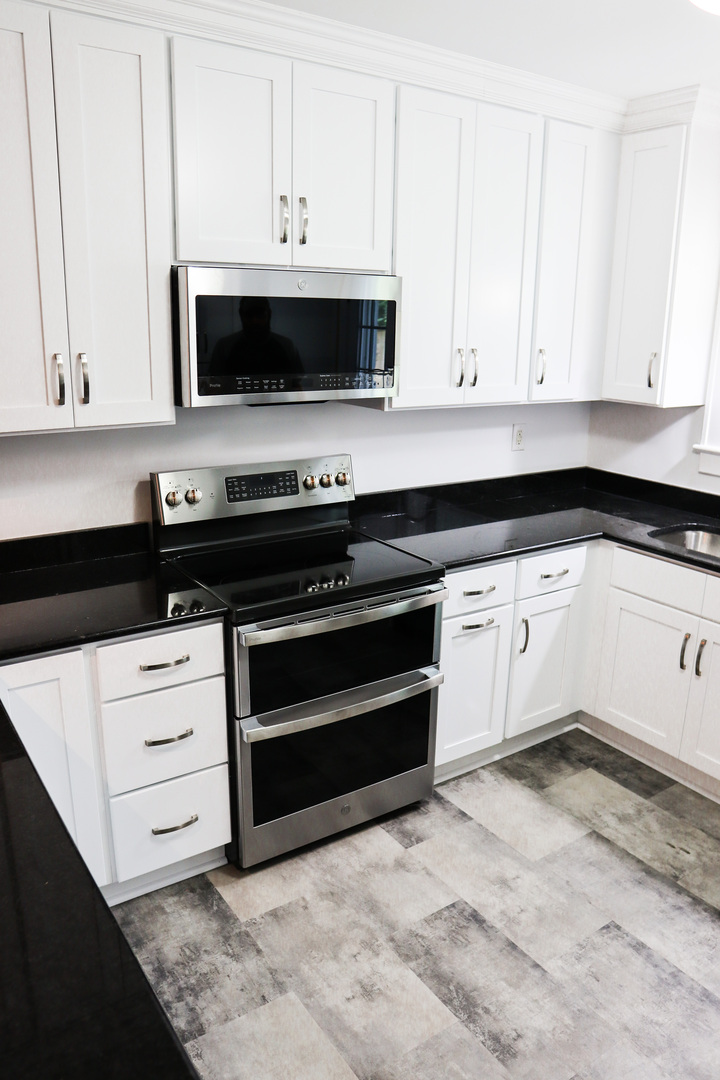
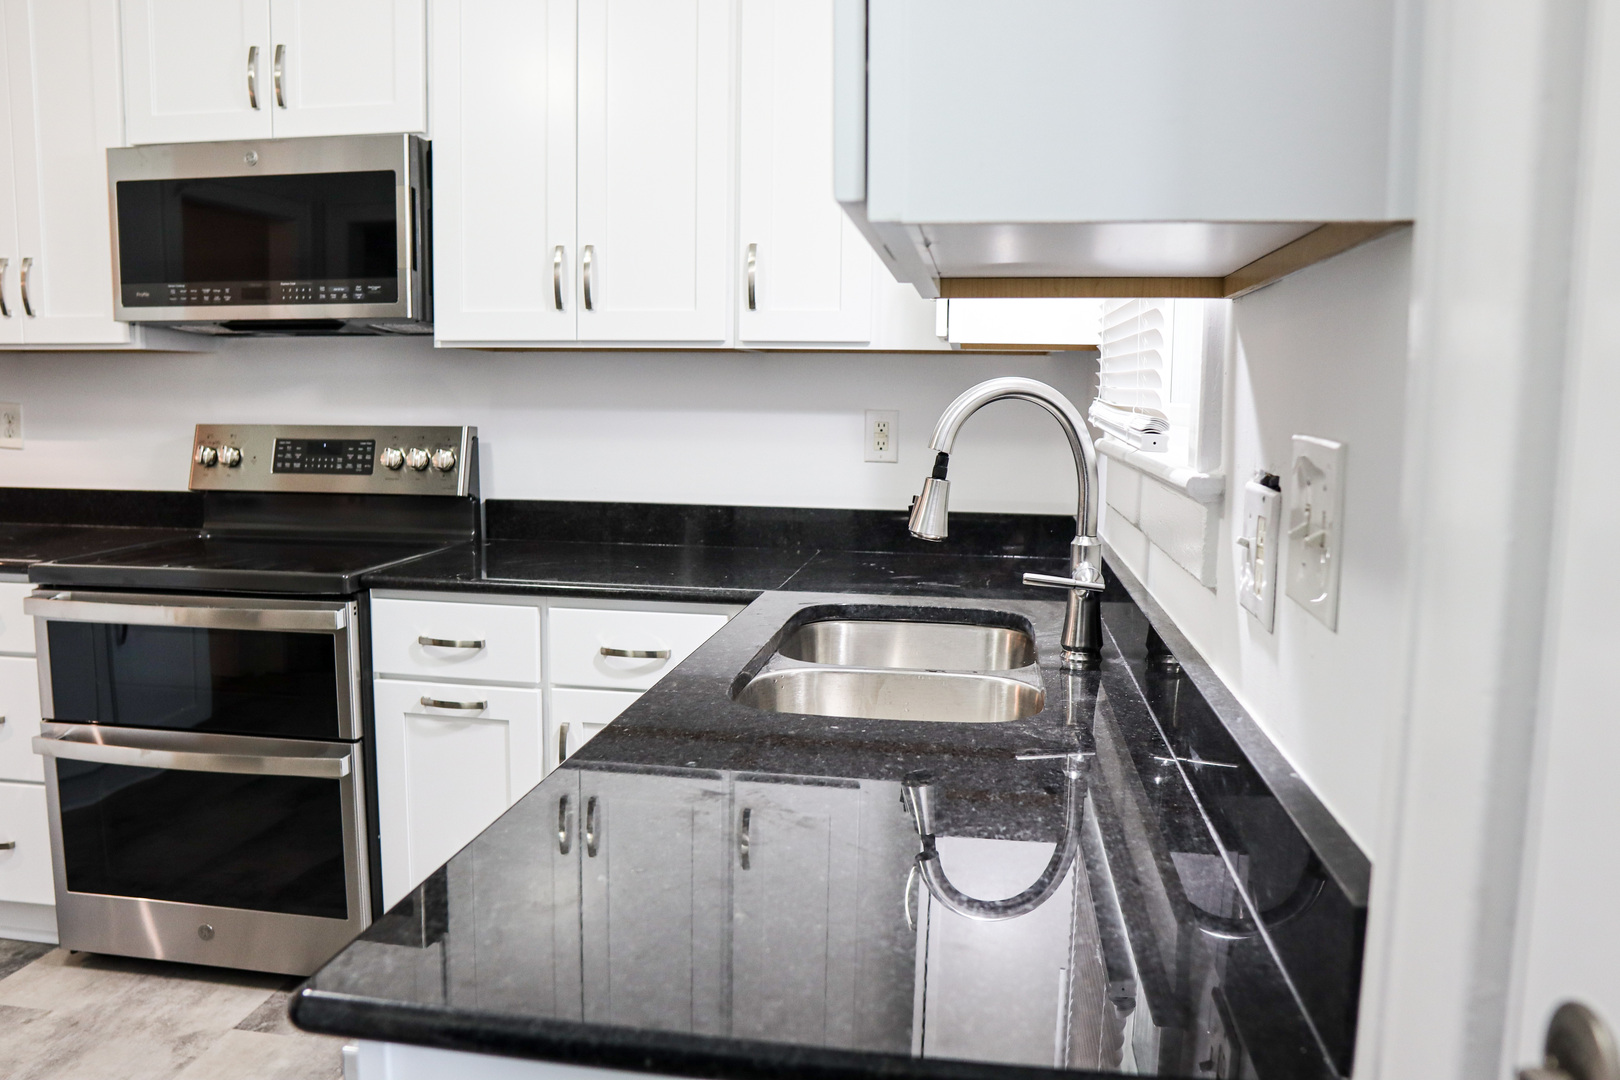
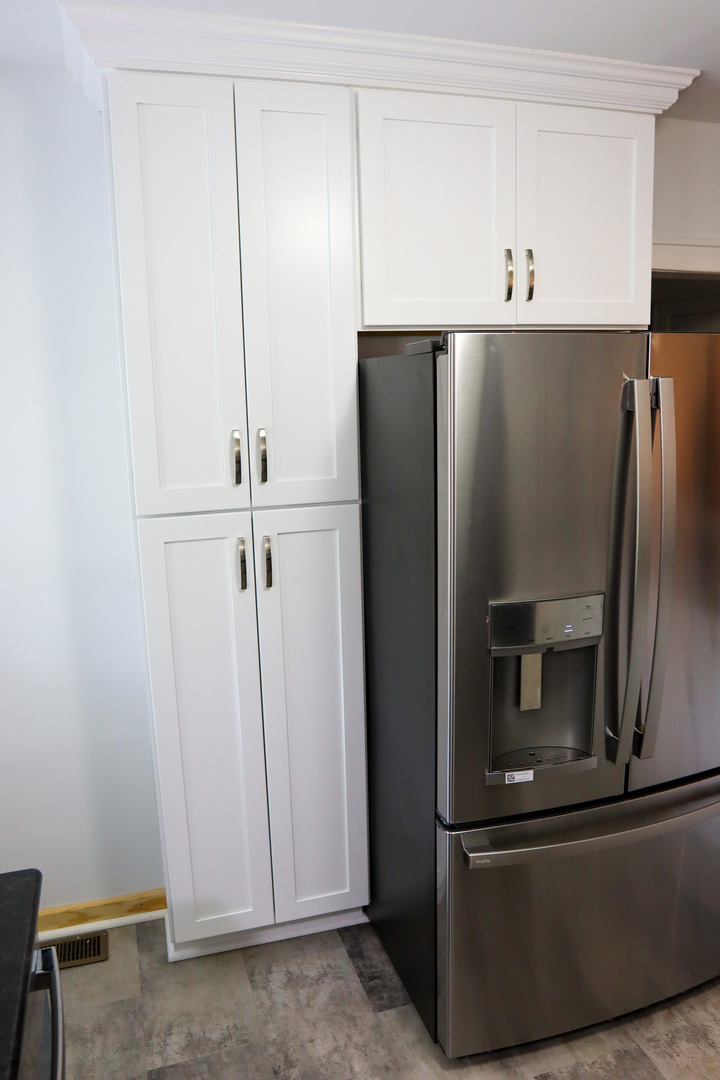
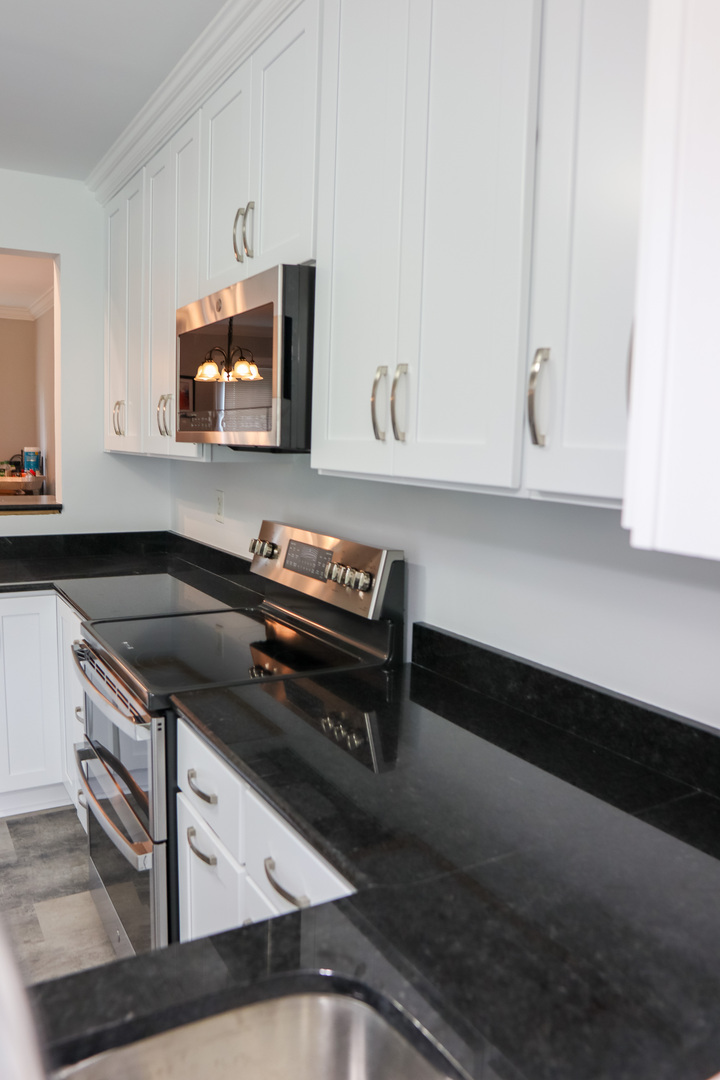
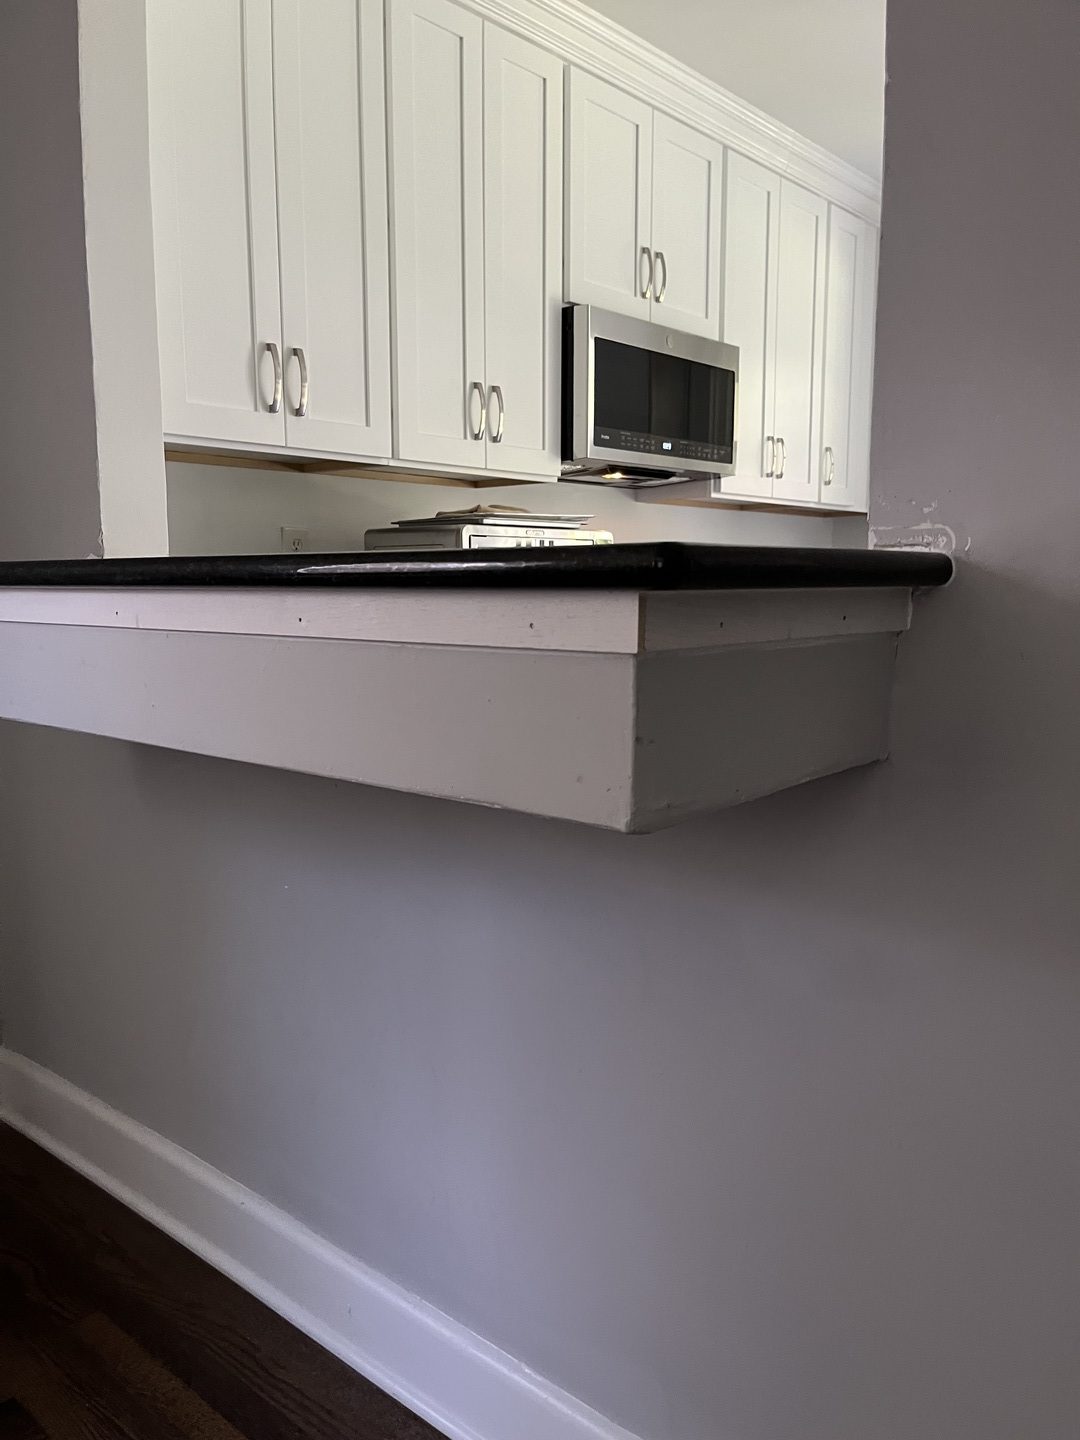
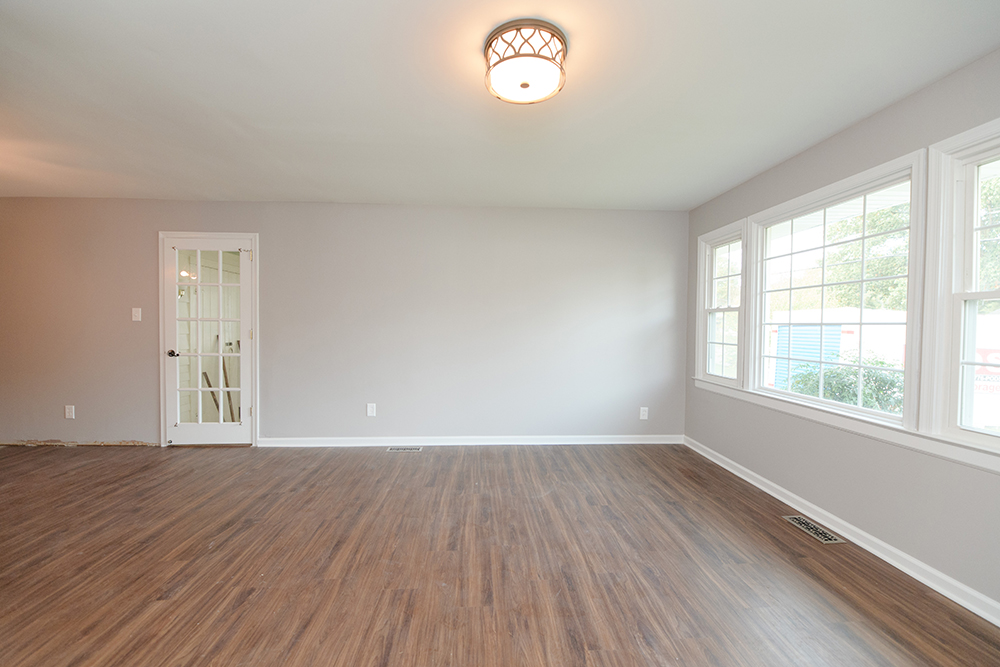
Once the claim was settled, it was time to go shopping! The original kitchen was very brown: traditional stained wood cabinets, brown granite countertops, and stained wood floors. Mr. Amadi chose to go with a much lighter palette for his new kitchen. The white shaker style cabinets and a light grey luxury vinyl floor create a fresh, contemporary look, while the new Black Pearl granite countertop sets off the black and stainless appliances nicely and adds a pop of color to the space.

As Mr. Amadi told us, it was “quite a ride” to get his kitchen restored, but we love the new look. Our kitchen remodeling team is here to help when unexpected damage turns into an opportunity for a fresh start.

If you, or someone you know, finds themselves going up against an insurance company on their own, please contact us. We’re here to help!

Kitchen Restoration in Hampton Read More »

Roof and Interior Restoration in Newport News

“I think that I shall never see a poem lovely as a tree”Trees, Joyce Kilmer, 1913

Ah, trees. They give us flowers in the spring, green leaves in the summer, and beautiful shades of red and gold in the fall. In the winter, their bare branches catch the snow and glisten in the sun. They provide a home for the song birds, and shelter our homes from the summer heat. And, sometimes, they  are the cause of our nightmares.


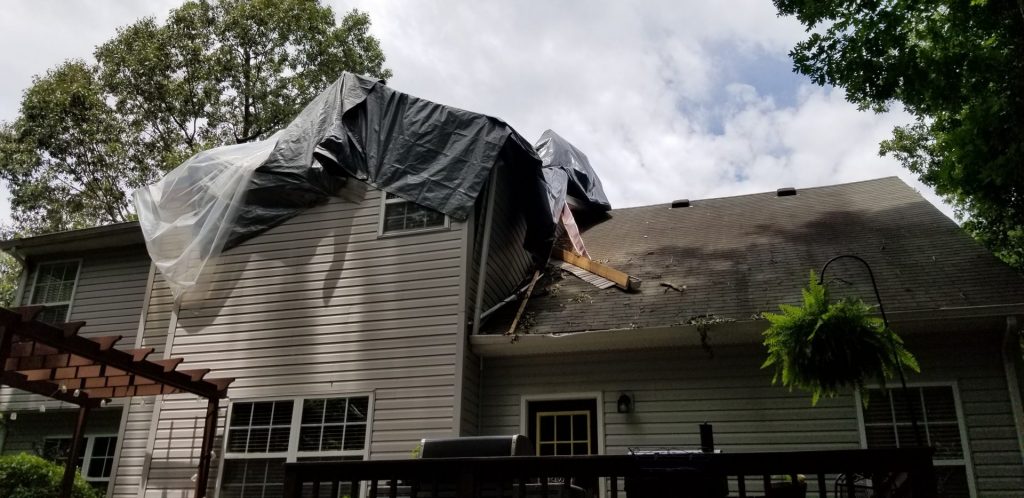
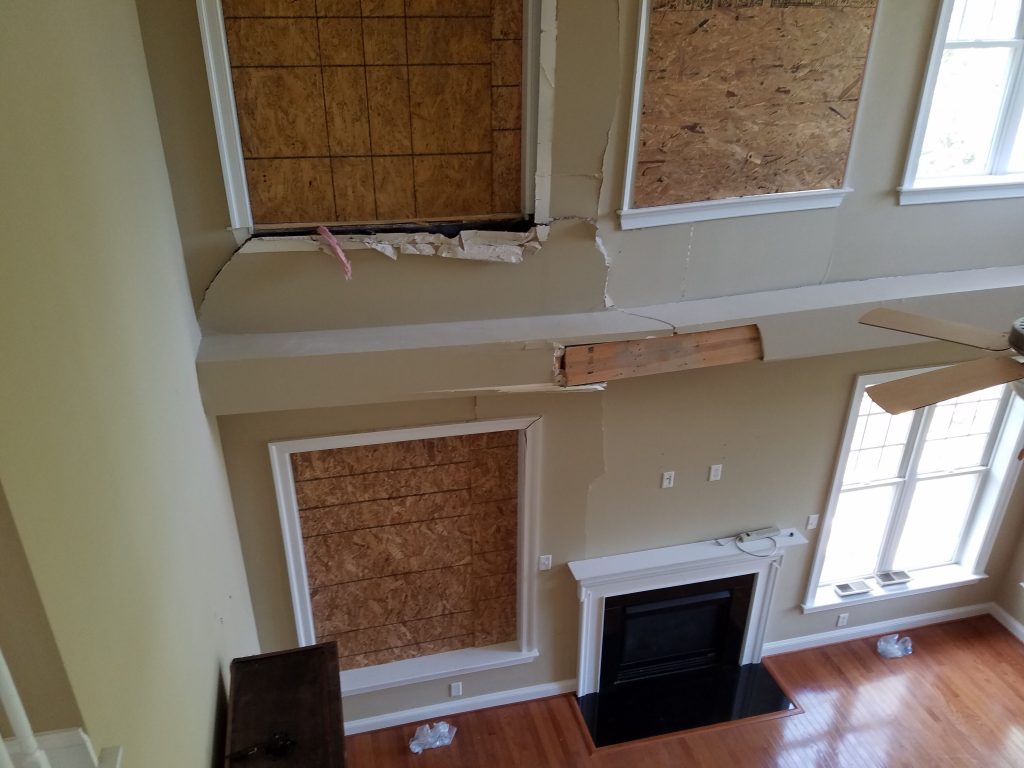
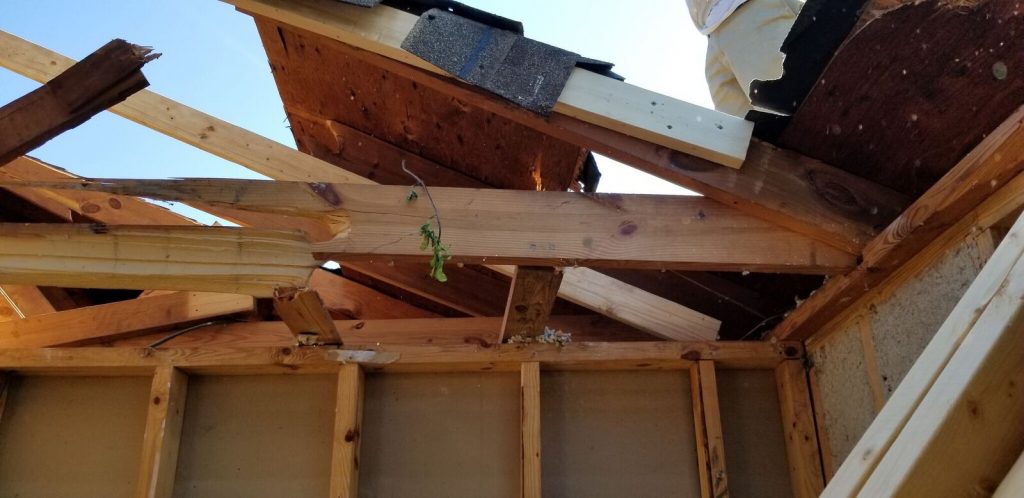
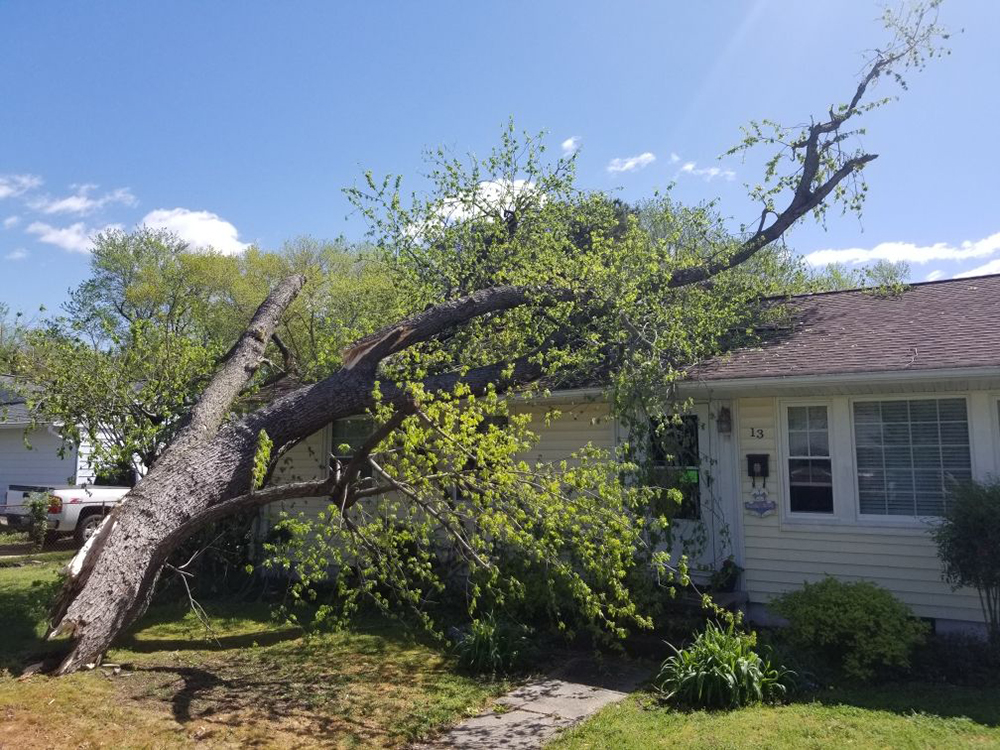
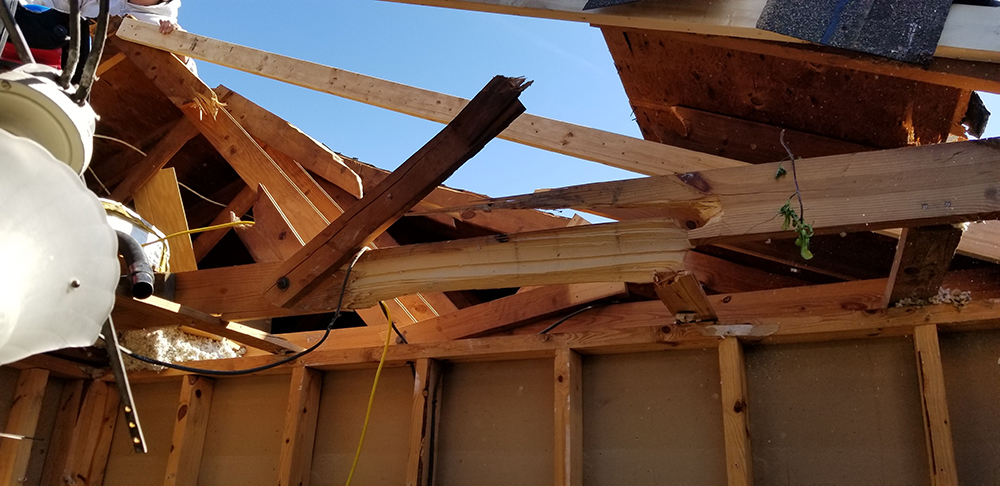
During a severe storm with high winds, that some reported as micro-burst tornadoes, our clients in Newport News dealt with the nightmare. The beautiful tree in the front yard came crashing through their home. The tree crushed the roof and rafters, and rain poured into their bedrooms and living room. Luckily, no one was injured, but the clients were facing the near-total destruction of their home and months of repairs.

Our good friends at Inside Drying in Yorktown were first on the scene. They tarped the roof to prevent further damage, and began the process of drying out the home and packing up the clients’ possessions. The drywall was removed from the walls and ceilings in living room and three bedrooms. The floors were removed next. With most of the house reduced to the studs, we were able to assess the situation and develop a plan for the repairs.


Working closely with the homeowners and their insurance adjuster was critical at this point. As in any disaster situation, the adjuster will create the initial scope of work for the repairs. This gives us a baseline of what is covered and what the insurance company believes it will cost. Our job is to review this scope, and supplement it with our calculations for the actual cost of materials and labor, and the requirements for the building codes in our area. This usually takes some negotiating, and the adjuster may request a follow up meeting on-site, to review the items that have been added to their scope. Once our estimate was approved, we got to work.


The roof was first. The remaining shingles were removed, along with the damaged rafters. New rafters were added where needed, and new roof decking was installed. The homeowner chose CertainTeed Landmark shingles in Resawn Shake. These shingles carry a lifetime limited warranty and a wind rating of 110 mph.

Outside, we also replaced the damaged soffit, fascia and gutters.


With the roof restored, it was time to address the interior damage. Since the space was almost completely gutted, we had a clean slate to work with. Electrical and HVAC repairs were made first. New drywall was installed on the ceilings and walls, and painted in the clients’ selected colors. For the floors, the homeowners chose a luxury vinyl plank, which was installed in all the rooms and the hallway. New ceiling fans with light kits completed the repairs.


The homeowner left the following comment on our business Facebook page:

“Jim Hicks knows his stuff! If it wasn’t for him helping us through our home repair and dealing with the insurance  company when a tree fell through our house, I don’t know what we would have done!! Jim and his crew did a great job and we love the work they did!!”


Start to finish, including several meetings with the insurance adjuster, this project took our team six months. The homeowners’ goal was to be back in their house in time to hand out Halloween candy to the neighborhood kids. Happily, we were able to make this request a reality.

Roof and Interior Restoration in Newport News Read More »
Popcorn Ceilings: Love ‘Em or Leave ‘Em?

A popcorn ceiling is defined as a spray-on or paint-on treatment, which has a rough, bumpy texture and is used to hide imperfections, absorb sound, and reduce echoes, especially in rooms with high or vaulted ceilings. Popular in the 70s and 80s, popcorn ceilings have recently been revived in new construction. There are several pros and cons to this:

Pros

  • Texturing hides flaws and imperfections in the ceiling
  • Deadens noise and reduces echoes in large rooms
  • Can cost less than a smooth ceiling, because less prep is required

Cons

  • Hard to clean – cobwebs, dust and dirt attach to the rough surface and are difficult to remove without damaging the texture
  • Hard to repair and, in older homes, may contain asbestos
  • Not recommended for kitchens or bathrooms as the moisture in these rooms can cause the texture to become loose and fall off


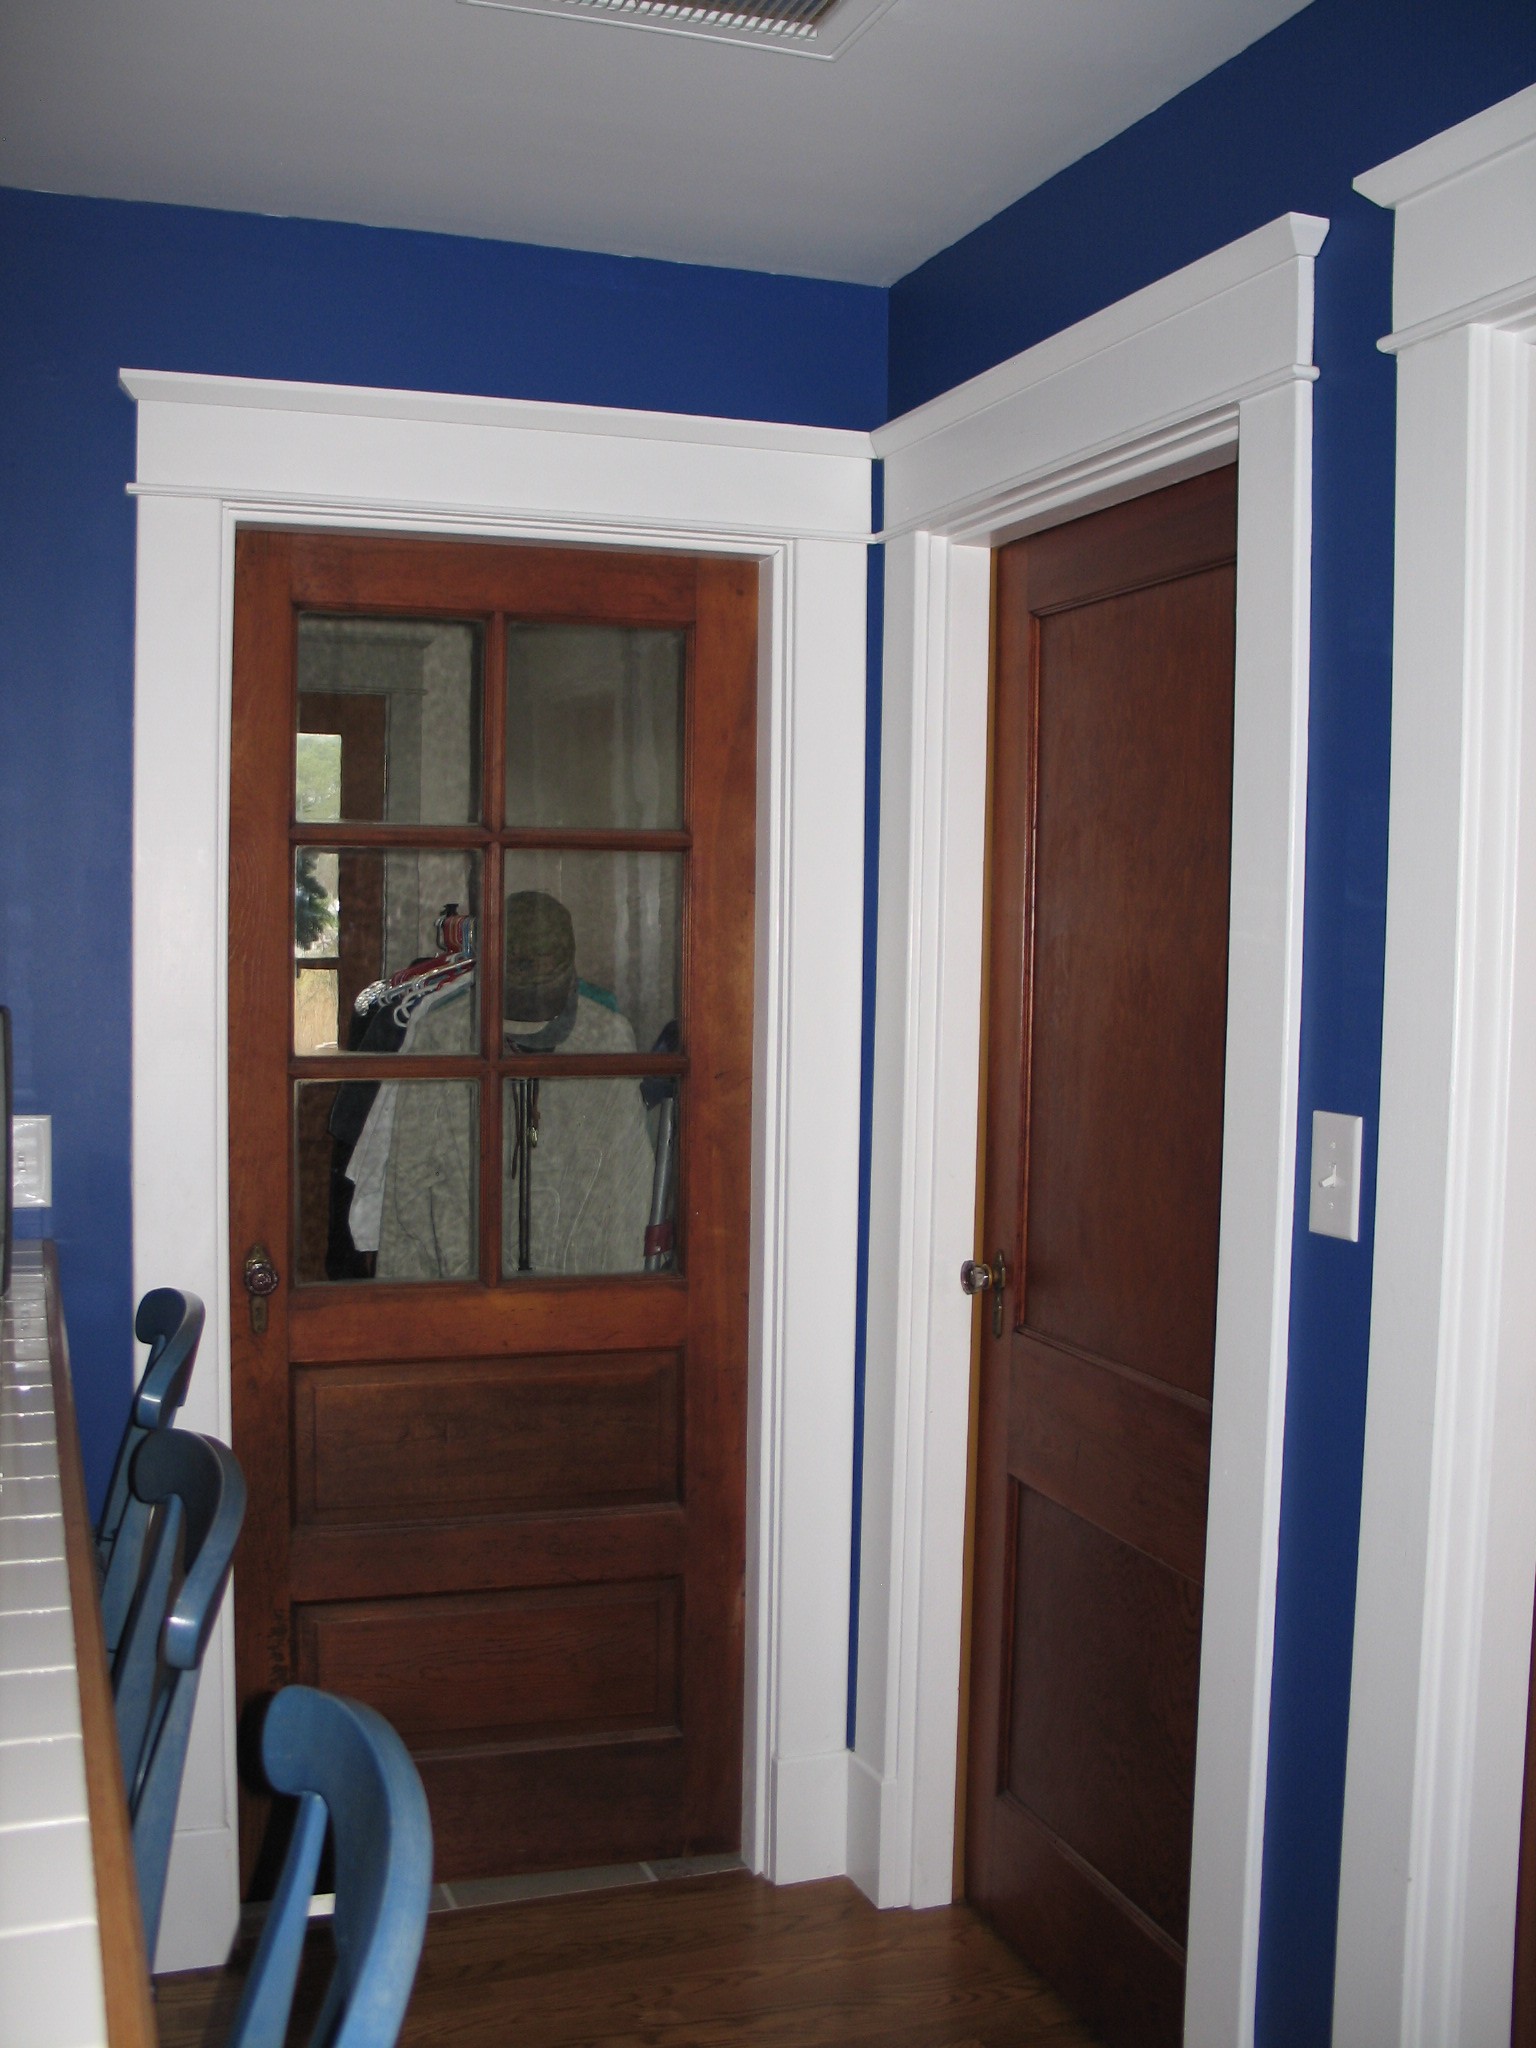
We were recently called in to remove popcorn ceilings from several rooms in a Newport News townhome. The client loved her home, but she hated the ceilings. The popcorn texture was even in the closets and on the garage ceiling!
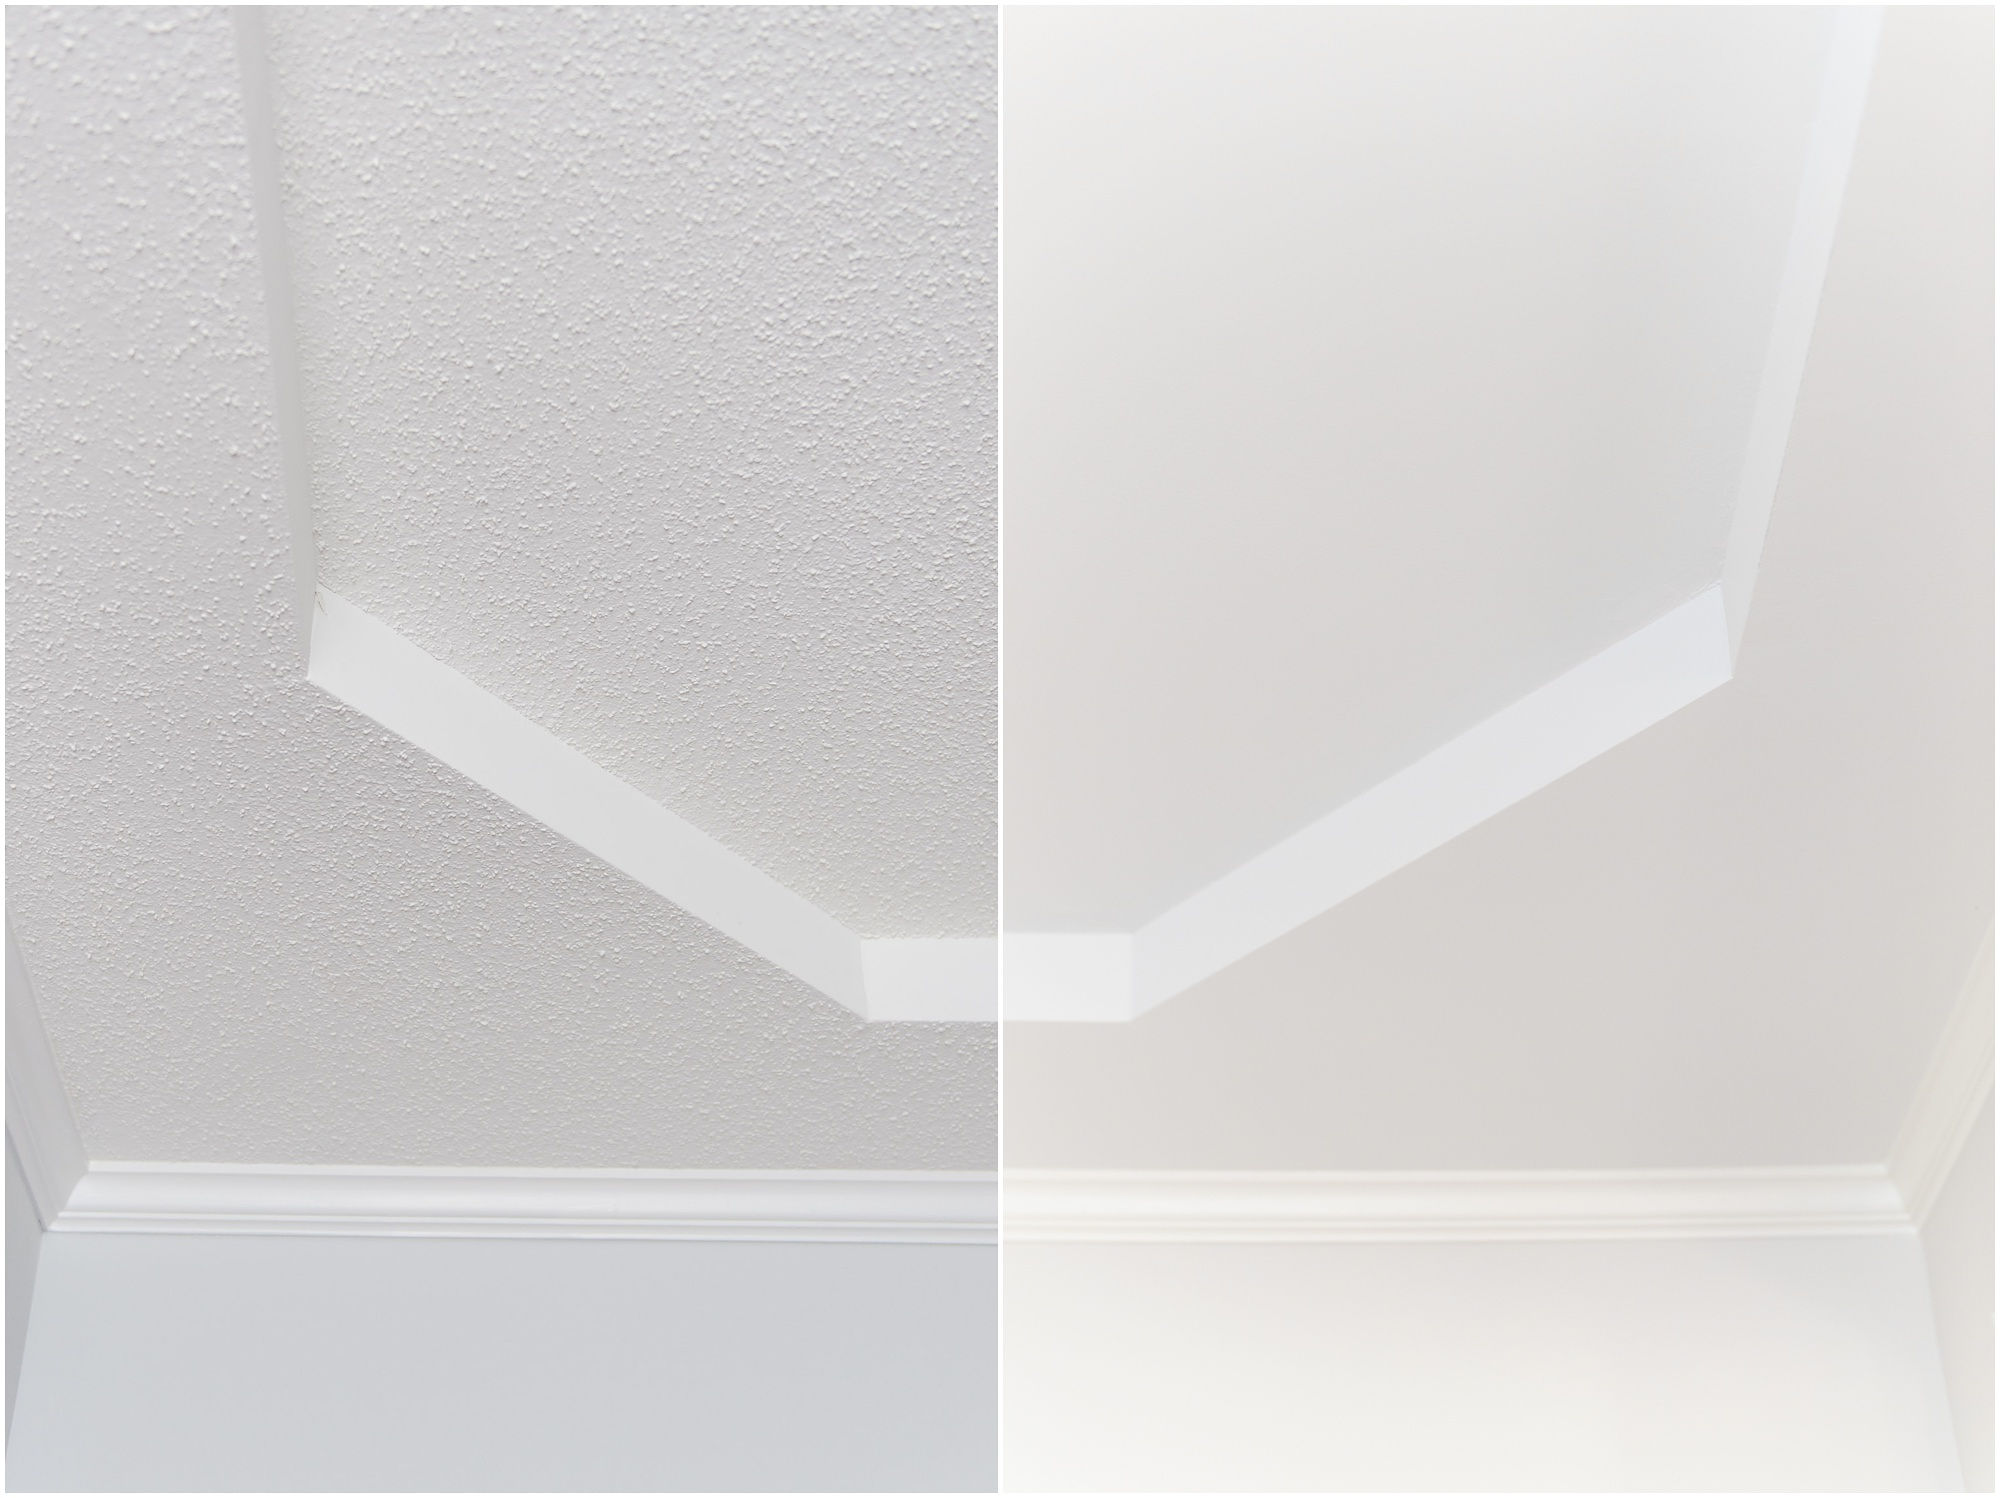
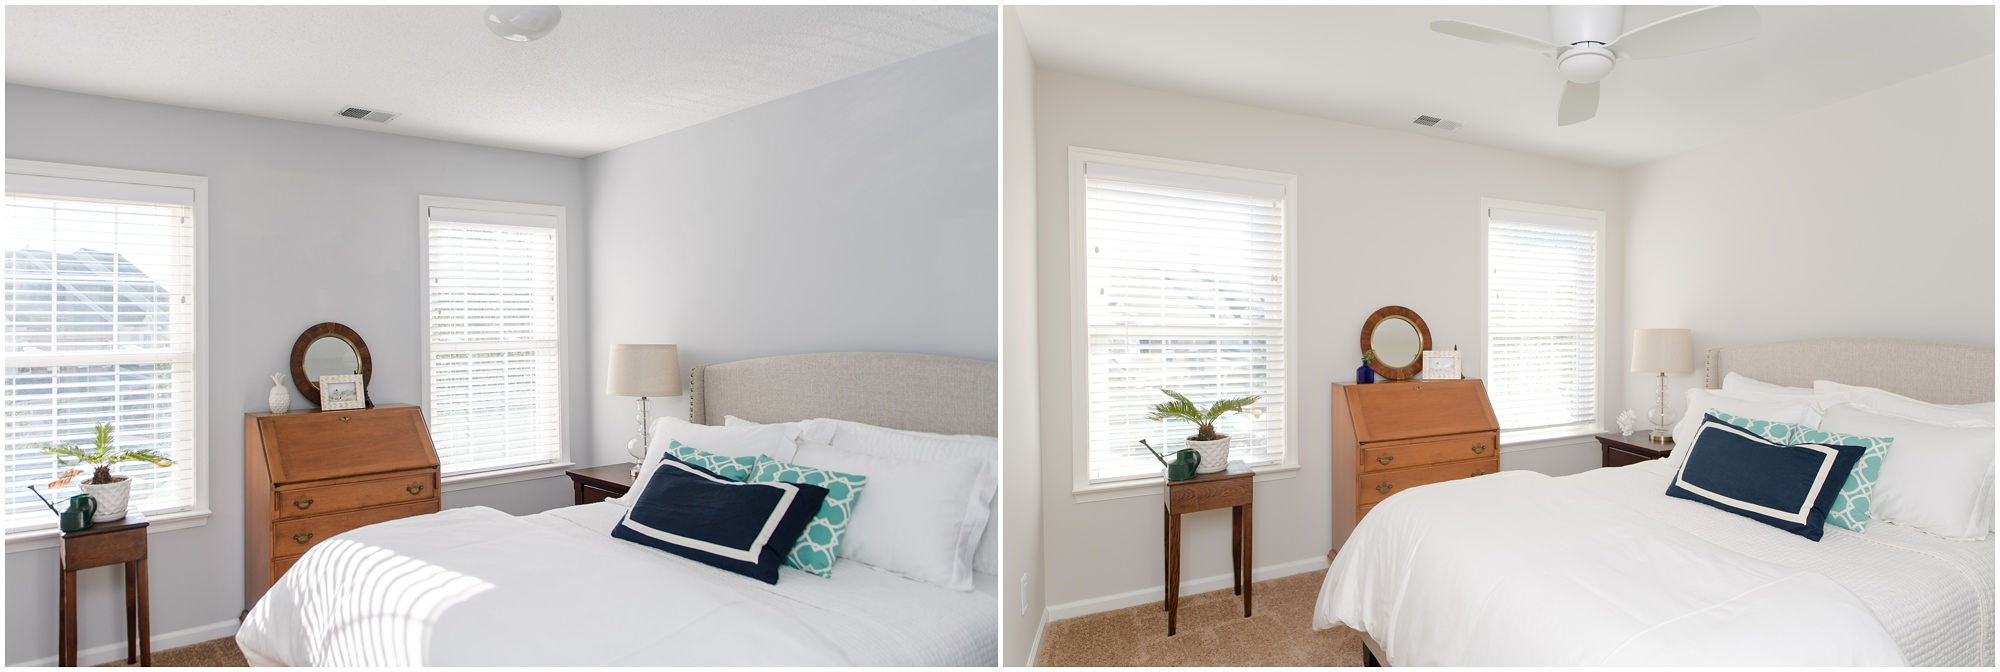
Luckily, because the home was built in 2001, asbestos was not a concern. The popcorn texture was scraped off, any areas of imperfection were smoothed out, and new paint colors went on the ceilings and walls of these rooms.
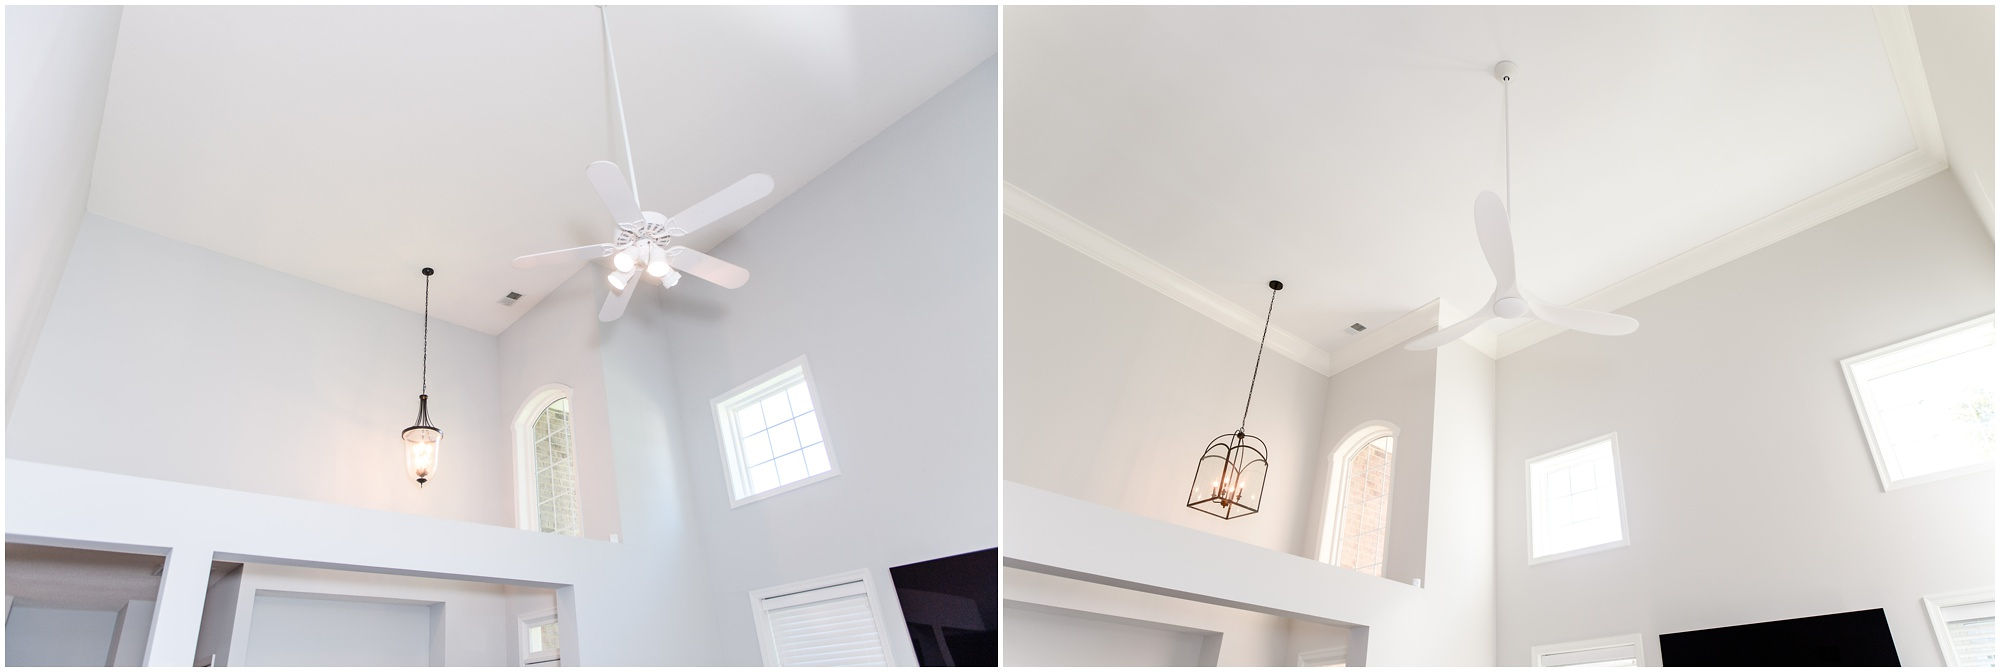
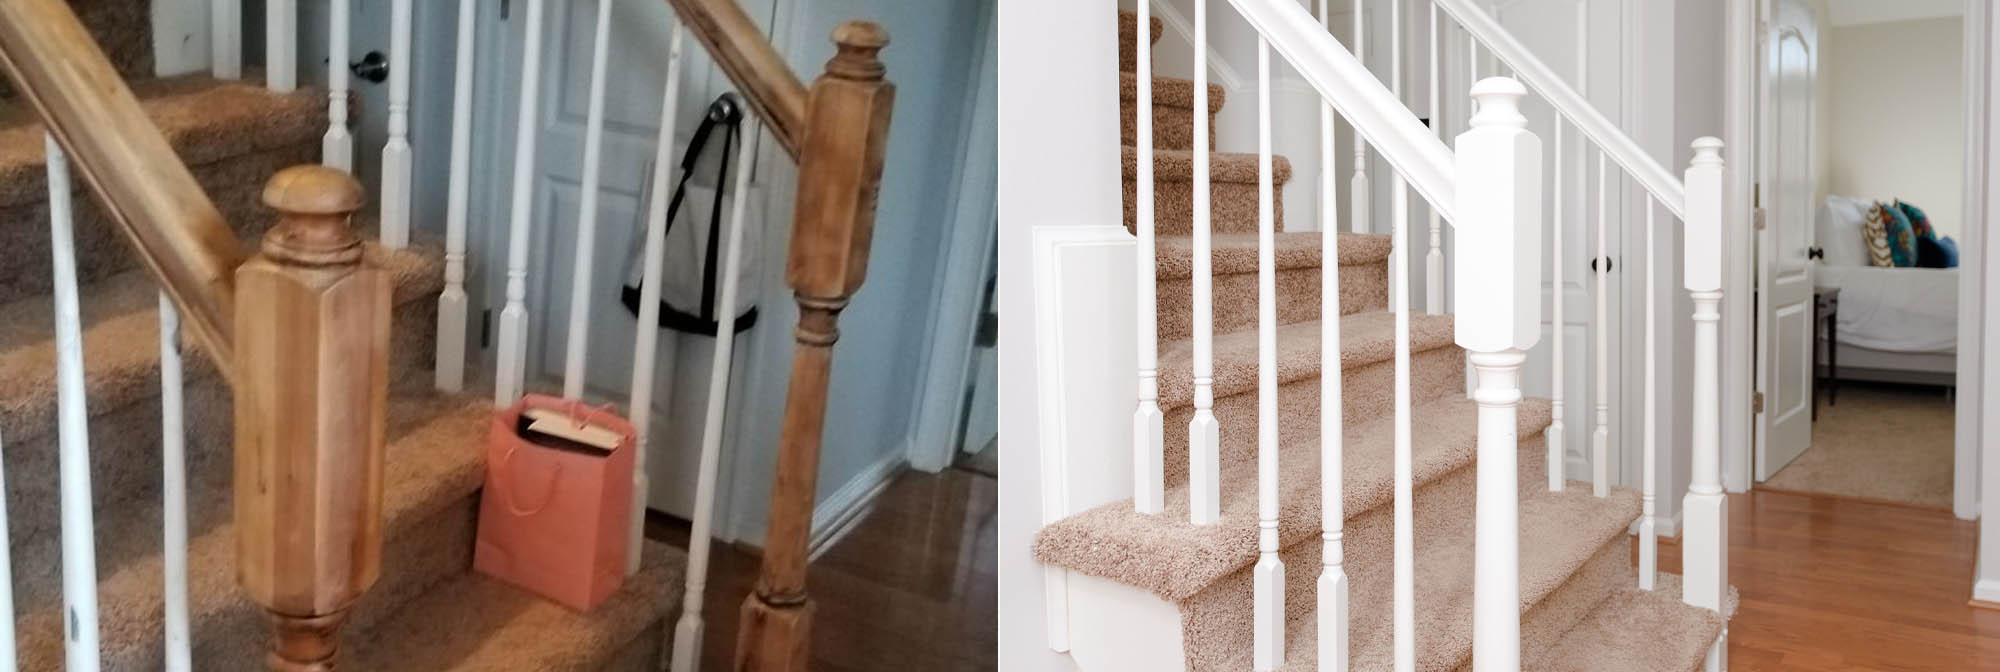
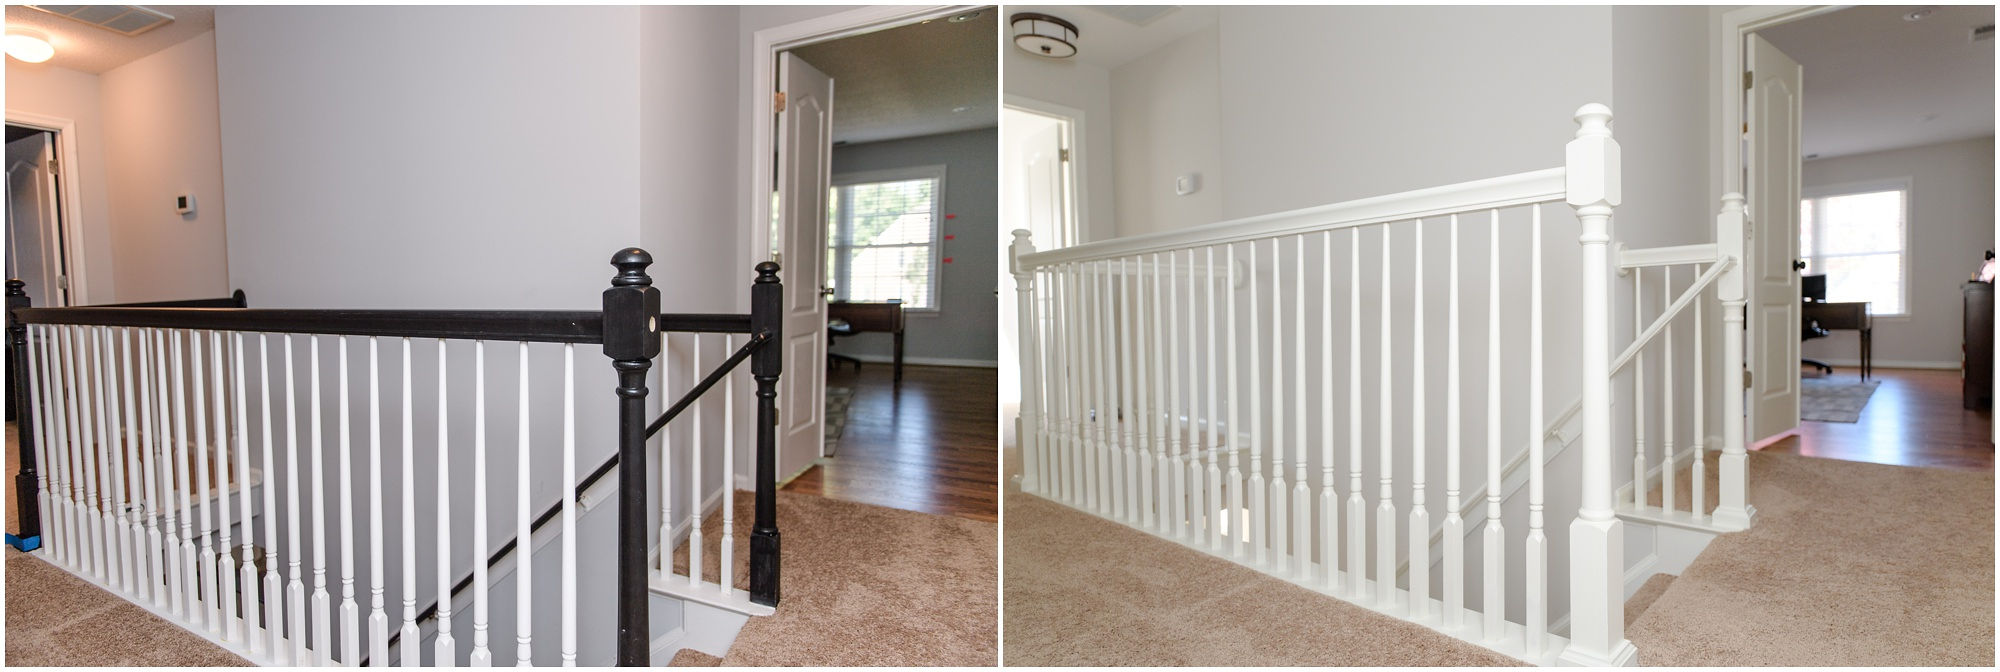
In the living room, the client wanted to add crown molding. Because the ceilings are so high, we went with 9-5/8” molding, which created a great focal point in the room. New ceiling fans replaced the original builder’s models in the living room and bedroom, and the lighting was updated in the foyer, dining room, hallway, and bedroom. (Check out that chandelier in the dining room!) The stairway railings and posts were repaired, and they received a fresh coat of white paint.

Removing the popcorn ceiling, adding new crown molding and paint, and updating the lighting made a huge difference in this beautiful townhome.


Popcorn Ceilings: Love ‘Em or Leave ‘Em? Read More »
Navigating Disaster Claims and Repairs – What to Expect

In your typical home improvement project, things move along pretty quickly. The homeowner and the contractor meet to discuss the project, agree on a scope of work and a price, and set a start date. Permits are pulled, materials are ordered, and work commences. The homeowner pays a percentage up front, to cover materials, and makes progress payments until the work has been completed.

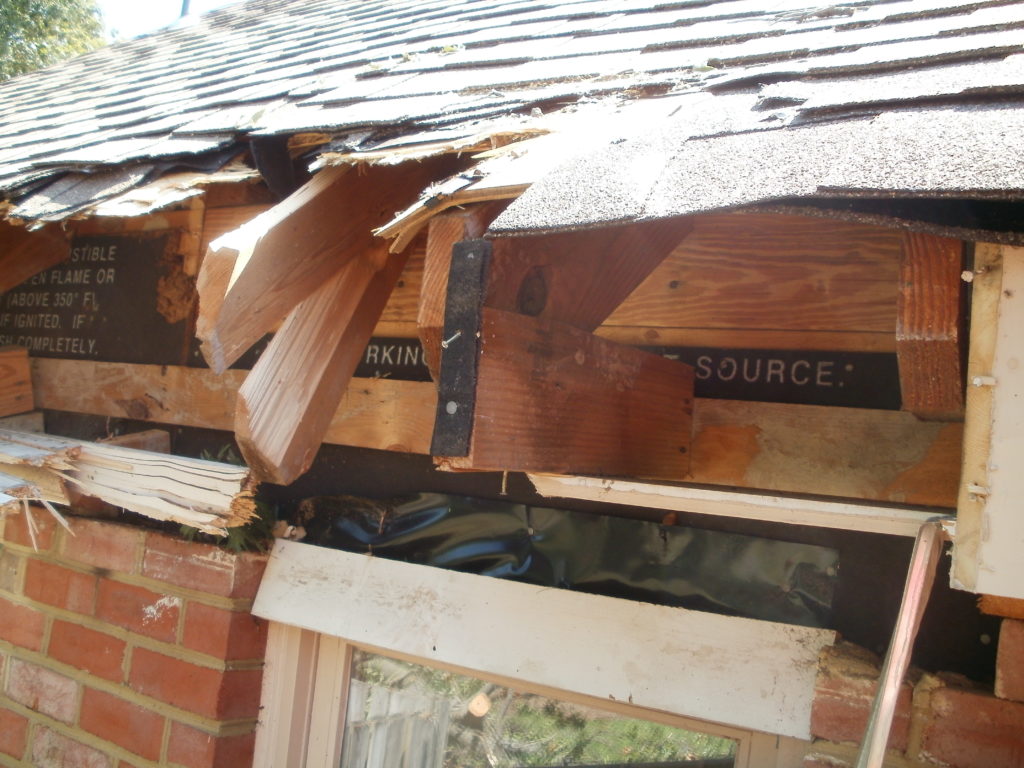
When disaster strikes – a tree falling on the house, a flood, a fire, etc. – this process can get complicated in a hurry:

  1. The homeowner contacts their insurance agent, who files a claim on their behalf, and sends out an adjuster to view the damage and write an initial scope of work. If this is a major storm event, it may take several days or weeks for an adjuster to reach you. Add another week to this for the adjuster to complete their written scope of work and estimate for repairs.
  2. The insurance adjuster completes an initial rough estimate. The purpose of this estimate is, chiefly, to get an initial check into the client’s hands quickly. (Neither the insurance company, the adjuster, nor the contractor expect the adjuster’s initial rough estimate to cover the actual cost of the complete repairs.) Next, the contractor reviews the adjuster’s estimate, to understand the scope of the work for which the insurance company is willing to pay. The contractor then amends the adjuster’s estimate with his own scope of work and estimate of the cost of the actual repairs. If the adjuster is working multiple claims in a disaster situation, this process may take several days.
  3. Once the scope of work and the price have been agreed upon by all parties, the insurance company writes the check. Depending on the dollar amount of the loss, homeowners may be surprised to find that the check is made out to them AND to their mortgage company. In this case, the payments to the contractor may only be released at the discretion of the mortgage lender, who may call for inspections at certain phases of the work. These inspections are in addition to the ones required by the city or county where you live, and they may cause the work to stop until a particular phase is approved.
  4. The contractor will apply for permits from the city or county. Each locale has their own rules and regulations, so the permitting process can take a few days or a few weeks.
  5. The homeowner requests the contractor’s deposit amount from the mortgage lender. The check usually arrives in 5-7 business days. (Get used to this process. It will be repeated every other week as the contractor bills for progress payments.)
  6. Materials are ordered and work commences.

As you can see, the average remodeling job is very streamlined, compared to the disaster repair. It’s easy to get frustrated with the process and the delays. Keeping the lines of communication open with your agent, adjuster, and contractor will help with this. Understanding the reasons for potential delays will give you a realistic expectation of the timeline for the repairs.

Some helpful tips:

  1. Choose a local contractor who is properly licensed and insured. In a major storm event, you are likely to be approached by someone who promises to get started immediately, if you give them a big up-front payment. While these “storm chasers” may be qualified to do the work, they are usually from out of state and won’t be around later, should you need to address any issues with their repairs.
  2. Ask your contractor whether he is familiar with Xactimate. This is the program most adjusters use to determine the scope of work and budget for your repair. If your contractor “speaks the same language” as the adjuster, negotiations on your behalf will go much more smoothly.
  3. Open a separate bank account for the insurance proceeds, and pay all damage-related expenses from this account only. This will help you keep track of what’s been received, and what’s been spent. You may need to account for this money on your tax return, so having all your expenses in one place will help.
  4. Know what your insurance policy covers (and what it doesn’t). Check in with your agent annually to ensure you have enough coverage, especially if the value of your house has increased. Ask about flood insurance, whether you live in a flood zone or not. Consider adding riders to your existing policy for big ticket items like electronics and jewelry, which may not be covered under a basic homeowner’s policy. Take a photo or video inventory of each room periodically, and keep it in a safe place. 


Choosing the right contractor and understanding your insurance policy, before you need to file a claim, can provide you with peace of mind during a very stressful time.

Storm Damage Restoration Project

Fire Restoration Project in Yorktown


Navigating Disaster Claims and Repairs – What to Expect Read More »

Stunning Kitchen Remodel in Newport News, Hidenwood Neighbood

This is a kitchen we just finished in the Hidenwood neighborhood of Newport News, near Christopher Newport University and James River Country Club.   We absolutely loved this project and our clients!  If you’re interested in the complete list of everything we did on this project it is at the end of this article.

In the meantime you can watch the video slideshow or scroll down for the larger versions of some of the pictures so that you can really see the detail in each image!


kitchen remodel Newport News backsplash kitchen cabinets flooring quartz countertops kitchen remodel Newport News black leather granite countertop quartz countertop kitchen cabinets kitchen remodel newport news black leather granite countertop quartz countertop kitchen remodel newport news lighting backsplash kitchen remodel backsplash and cabinets newport news kitchen remodel granite countertop newport news Kitchen Remodel Newport News Granite Countertop Kitchen Cabinets


Our Scope of Work for this Kitchen Remodel Project: 

Demolition

  1. Demolish remove and dispose of:
    1. Cabinets
      1. Existing kitchen cabinets
      2. Kitchen island
      3. Wet bar and wall cabinet
    2. Existing sink and plumbing fixtures in both kitchen and wet bar
    3. Existing countertops
    4. Existing trim on paneled walls
      1. Door casing
      2. Window casing
      3. Crown molding
      4. Baseboard
    5.  Appliances
      1. Double ovens
      2. Existing cooktops and down drafts in both island and wetbar

 HVAC

  1. Move HVAC register under toe-kick in base cabinet near dishwasher
  2. Run new gas line to new cooktop location

Plumbing

  1. Adjust plumbing supply and drain lines as necessary for kitchen sink and hook up new sink drain, attach disposal, hook up faucet, and attach dish washer drain line
  2. Furnish and install new customer selected kitchen sink and faucet
    1. KITCHEN FAUCET – quoted from Ferguson $209.62
      • LF 1HDL PO KITC FCT ARST 1.5 GPM
    2. Furnish and install new customer selected wet bar sink and faucet
      1. BAR FAUCETS -quoted from Ferguson $311.50
        • LF ALLEGRO BAR FCT 1.5 GPM
      2. Hook up dishwasher supply line
      3. Re-route ice maker supply line to new refrigerator location and hook up.
      4. Garbage disposal will be replaced.
      5. Sinks:
        1. Stainless steel sink at wet bar
        2. Blanco Silgranit ll 1 3/4 Bowl Low Divide Anthracite for kitchen sink

Electrical

  1. Provide electrical demo as necessary.
  2. Wire for duel fuel range in new location.
  3. Wire for new range hood in new location.
  4. Relocate refrigerator outlet.
  5. Wire for dish washer in new location.
  6. Wire for garbage disposal in new location controlled by switch.
  7. Furnish and install four six inch recessed lights in same locations as existing four inch cans, to be controlled by dimmer switch.
  8. Furnish and install five LED under cabinet lights controlled by one switch.
  9. Install two new GFCI protected receptacles in kitchen island.
  10. Install two customer supplied pendant lights controlled by two three way dimmer switches.
    1. Remove ceiling fan in den and replace with one ceiling mounted pendant with multiple hanging lights ( Fizz -5 lights) over the eating island
    2. Replace light fixture over sink with George Kovaks – single mount with 5 hanging lights
  11. Furnish and install One three inch recessed light in glass cabinet controlled by one switch.
  12. Relocate receptacle in bar area to new location.
  13. Relocate recessed light over bar to center of bar area.
  14. Demo wiring and switch for whole house fan.
  15. Replace light fixture in den with light fixture in kitchen


Finishes

  1. Walls:
    1. Install drywall walls over the existing paneling in the kitchen area.
    2. Repair drywall in den where electrician needs to cut existing drywall to change light fixtures and run wire.
    3. On new drywall walls: Trim interior of doors, windows, and walls with new stained:
      1. Door & window casing
      2. Base Board
      3. Crown molding
  1. Floors:
    1. Repair hardwood floor where hvac register has been removed.
    2. Repair area around island
    3. Re-set toilet
    4. Sand and finish hardwood floors in kitchen area to extend to the garage door and bathroom (inside the decorative detail in the floor)
    5. Install 3 layers of poly on sanded floor and 1 layer on existing shoe molding.

   Kitchen Cabinets:

  1. Kitchen: furnish and install customer selected cabinets – refer to attached drawing for cabinet layout
    1. 42” wall cabinets with crown molding
    2. Aristokraft Cabinetry, All Plywood Construction, Soft Close Full Extension Dovetail Drawers
    3. Teagan Doorstyle, Maple, White Paint Finish
  1. Blind Corner “Cloud” Pullout Storage Unit in Corner by Kitchen Sink
  2. Spice Rack Storage in Wall Cabinet to Left of Hood
  3. Pegboard Storage to Left of Stove; Tray Storage to Right of Stove
  • 24” Deep Panels on each Side of the Refrigerator, and a 24” Deep Cabinet Above (for built-in look)
  • Rollout Shelves in One Island Cabinet, Double Trash Bin in the Other Island Cabinet
  1. Rollout Shelves in Cabinets by Stove
  2. Drawer Base by Dishwasher
  3. Microwave Cabinet on Right of Hood
  • Baseboard Molding to be Used at Base of Island, Wet Bar, and Island Table
  • Flush Contemporary Molding to be Used as Crown Molding
  • Berenson Hardware for All Doors and Drawers – Item #9234-1BPN-P
  1. Glass Doors and Shelves for Wall Cabinet over Bar Sink
  • Glass Shelf Mounted to Granite Top in Wet Bar Area
  • Stainless Steel Undermount Bar Sink
  • New Aristokraft Cabinetry Doors for Existing Pantry Cabinet by Doorway
  • Cabinet & hardware material cost: $19,005.04

Kitchen Counter tops –

  1. Install new Black Pearl Leather Granite (Kitchen Island Tops and Wet Bar)
  2. Altea Vicostone (Perimeter Counter Tops)
  3. Backsplash
    1. Install tiled backsplash under the wall cabinets in kitchen and wet bar
    2. Schluter edging system – Brushed Stainless Steel EB
      1. 9’ of edging on backsplash outside terminations
        1. On the side by the entrance to the kitchen
        2. On both sides of the wetbar
        3. Along the top edge of the tile at wetbar where there is no wall cabinet
        4. 2’ of outside corner on the wetbar backsplash

Paint

  1. Paint all walls, trim and ceiling in kitchen area. (Estimated for a neutral color: 2 coats. Bolder colors may include more coats)
  2. Paint ceiling in Den

 Stain

  1. Stain all new door & window casing
  2. Stain all new baseboard
  3. Stain all new crown molding trim
  4. Stain new T-111 siding replaced on roofing & siding repair.

Skylight in kitchen

  1. 21” x 46” Velux skylight will be installed
  2. Skylight tunnel will be framed from roof deck down to ceiling of kitchen.
  3. New drywall will be installed for walls of skylight tunnel
  4. Drywall will be painted

Sun Tunnel in hallway

  1. Sun Tunnel – Remove house fan and install 14” sun tunnel
  2. Includes painting hallway

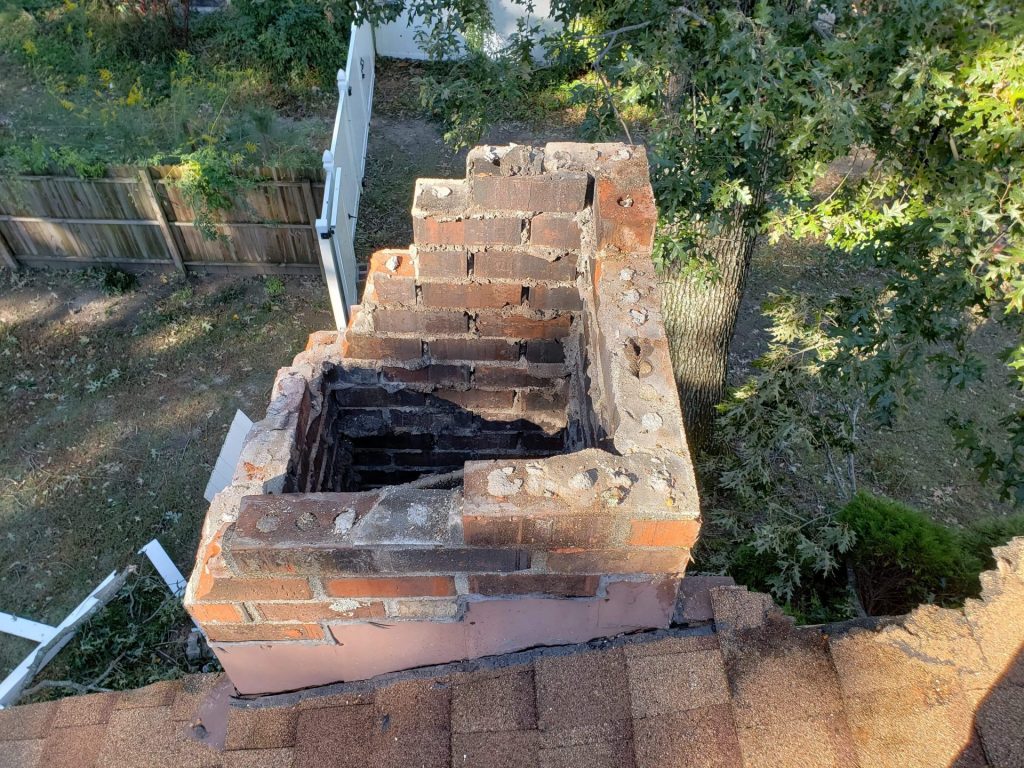
Roof repairs on chimney

  1. Remove shingles, flashing and T-111 siding on rear slope of garage where roof meets sided wall
  2. Install new ½ cricket in dead valley area to prevent ponding water
  3. Install new shingles and flashing along chimney, cricket and wall
  4. Install new T-111 siding in repair area
  5. Stain new siding to match

Stunning Kitchen Remodel in Newport News, Hidenwood Neighbood Read More »

The Kit Homes of Colonial Place, Norfolk Virginia

It’s amazing the things you learn and the people you meet on Facebook. I have been working on the homes in Colonial Place, Norfolk for many years. I’ve done slate & shingle roofing, carpentry, home additions, bath remodels, siding , etc…I knew it was a historical neighborhood but I didn’t realize that one of the cool people that I was connected to on Facebook was the Colonial Place Historian! Rose Thornton has written a book about the homes there and has done 100’s of lectures on them!

If you love this stuff, like I do, check her post out about The Kit Homes of Colonial Place. Click Here:  http://www.searshomes.org/index.php/2011/02/19/the-kit-homes-of-colonial-place-norfolk-virginia/


Check out Rose’s study of these amazing homes!


The Kit Homes of Colonial Place, Norfolk Virginia Read More »

This weekend in 2003 Hurricane Isabel hit Hampton Roads

Hurricane Isabel was the hardest hit that Hampton Roads Virginia has taken from a storm in over 20 years. It caused devastation from Virginia Beach to Yorktown, Virginia.

The majority of the damage that we experienced resulted from falling trees. Tree hits house due to Hurricane Isabel

Because of the widespread flooding, many homes in low lying areas have since been raised so that they are not flooded again. This house on Beach Road in Hampton was raised due to the damage it suffered during Hurricane Isabel.
Beach Road in the Fox Hill Area of Hampton, Virginia

The damage inside the home was so extensive that the interior had to be completely restored. To ensure that the trim matched the original architecture of the home, the carpenters milled all of it onsite.
Custom Trim

IMG_0275

Custom Trim Milled Onsite


On this, the 10th anniversary, we had many friends share memories of the storm and the aftermath:

“My parents were given a wraparound porch courtesy of my neighbors 100 yard long floating dock. It actually helped them and protected their house from all the debris and waves. Their other neighbors house? Not so much. Everything bounced off the dock and into theirs and part of the dock knocked the house off of its foundation.”  – Doug Jaeger, Washington D.C.

” My parents neighbor that lost his house was a crotchety old man from my first memories of him until his dying days. He was an alcoholic who probably suffered PTSD. Almost all of their worldly possessions were destroyed. I was talking with him the day after and people were driving through the neighborhood looking at all the destruction, taking pictures and gasping at people who lost their homes. He snapped and started yelling and cursing at them for staring at people who had just lost everything, telling them they weren’t some circus side show freak here for their viewing pleasure. For that one moment, I was one of the few friends that he had. Any negative feelings I had towards him disappeared. He was a fighter pilot in Korea and I think the early part of Vietnam. I hope he has found his peace not that he has passed.”  – Doug Jaeger, Washington D.C.

“The hurricane and the damage were terrible but, even worse, were the low lifes who parked in front of our house and went through our ruined possessions at the curb. I was crying and they were anxiously waiting to see what else they could score. Sick. ” Kim Hannah, Hampton Virginia

“It was nerve-wracking for sure, but some of our best memories from where we lived in Hampton then were of all of us neighbors coming together to help each other out. I have some funny photos of extension cords running from the neighbors house to our generator…” – Jeanne Fiocca, Yorktown Virginia

“Olde Wythe looked like Armageddon. And we lived like the Amish for 13 days. You knew everyday after work & on weekends, all you could do was join the sympathetic gatherings for watching the endless tree removal … cut out of and off of our neighbors’ houses. Ironically, it put life on pause with a lasting positive impact … we all came out of our little abodes, shared stories of loved ones, distributed thawing freezer food for cookouts, and my ex-husband created fire hazards by jerry rigging all our generators to central electrical panels. When those generators stopped humming & the street lights illuminated again, our brains had trouble adapting to the eery silence but our hearts embraced new found friendships that have lasted 10 years now.” – Anne Shuford, Hampton Virginia

“Mom was at my brother’s when Isabel hit. He was living in Toano at the time. I called her a few days before Isabel hit and suggested that she pack up as many grandkids as she could and bring them to Florida so they could avoid the storm. Let the adults weather that crap. She hemmed and hawed and ended up not doing it. She wished she had after!” – Jim Fidler, Middleburg Florida

“It hit 09/18/03. G & I were on our way to Hawaii to get married & didn’t know if we’d come back to a house or pile of rubble since we live in Poquoson. We had 15″ of water in our garage. G lost some tools but that’s it.” – Crystal Sullivan

“You don’t have to remind me, Jim. I lost my home in Willoughby because of that storm. Watched my deck break off the house in the storm surge and float out to sea. Then the house broke in half after the waves undermined the foundation. Nightmare.” – Markus Hopkins,  Virginia Beach Virginia

“It was right after my family came back from NYC where there was a power outage. Then, there was a two-week power outage for Isabel. It was a real sucky month.” – Gail Kent, Newport News Virginia.


This weekend in 2003 Hurricane Isabel hit Hampton Roads Read More »
Remember Hurricane Irene?

It was 2 years ago today that Hampton Roads, Virginia got slammed by Hurricane Irene.  It was the hardest we’ve been hit by a Hurricane since Hurricane Isabel in 2003.  If you were here, you’ll remember that Sandbridge in Virginia Beach suffered several tornadoes that were spawned by the storm and Newport News had major damage to an apartment complex due to falling trees. Many low lying areas were flooded and 1.2 million homes and businesses lost power. Three people in Virginia were killed due to the storm

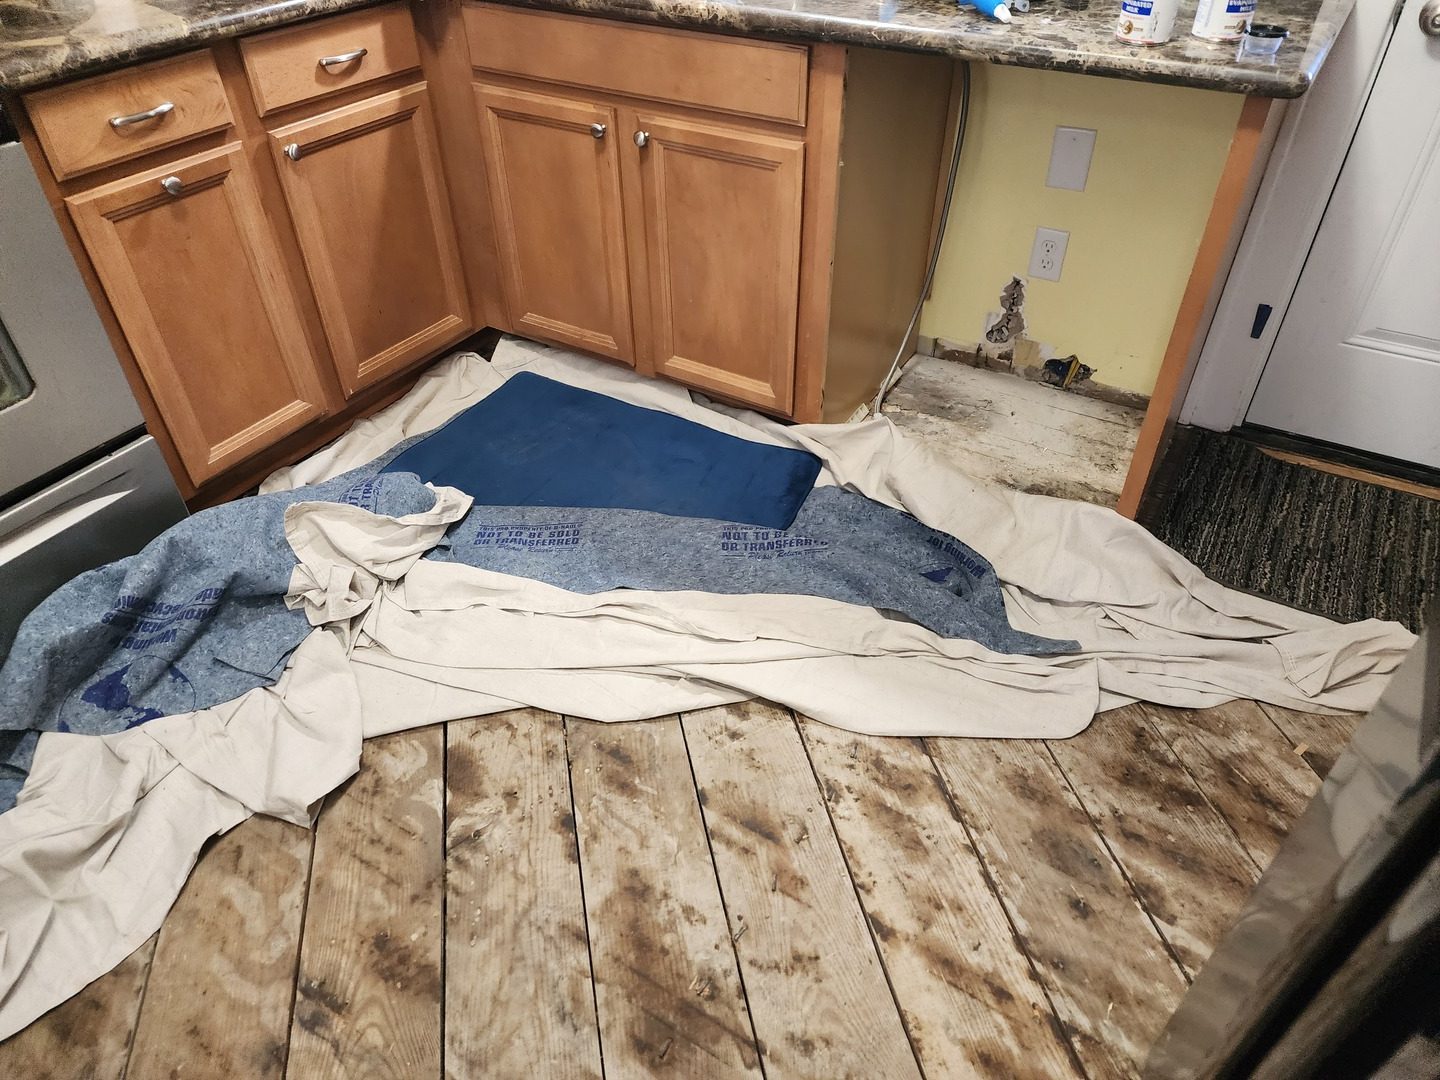
Most of the major damage caused by the last several hurricanes have been from trees hitting roofs: tearing shingles, crushing plywood and rafters, and piercing straight through homes leaving the owners with the need for major water remediation, restoration and remodeling.
Home Damage by Hurricane Irene
The most damage that we have suffered in the last 20 years, here in Hampton Roads Virginia was from Hurricane Irene.  Again the trees were a major factor.  The earlier part of the year we experienced much higher than normal rainfall that left the ground very soft.  This resulted in many trees being pushed over by Isabel’s high winds and many of these trees caused major damage to homes.  I personally remember responding to calls and being able to stand in the front yard, looking right through the house that had been cut in two by a falling pine tree, and seeing the back yard.

This year, many of the contractors and remodelers in Yorktown and Newport News Virginia have been talking about how heavy the rains have been and that they have been very reminiscent of  the kind the Hampton Roads Area experienced in 2003 .  Hopefully, if this Hurricane Season proves to be an active one, we won’t experience the same type of damage that we saw in 2003.

Looking back to 2011, I thought I’d share a video or two of Shawn and I tarping roofs in Hampton, Yorktown and Williamsburg that had suffered damage from the storm.   Not really oscar worthy stuff here, but a walk down memory lane all the same!


Remember Hurricane Irene? Read More »
Success Profile for Jim Hicks in Hampton Roads Magazine

"I just want to see my smiling face on the cover of The Rolling Stone"
“I just want to see my smiling face on the cover of The Rolling Stone”  (click on image to enlarge)


Success Profile for Jim Hicks in Hampton Roads Magazine Read More »